Shared VPS Dedicated WP Professional Plus
What are mailboxes?
Mailboxes are custom email addresses you can create on your hosting account. If you have a custom domain, like example.com, you could create email addresses that use it, like [email protected] or [email protected].
Once you create a mailbox, you can use it like any other email address. You can access your new mailbox's inbox by going to our webmail interface or using an email client, like Outlook or Mac Mail.
Creating a Single Mailbox
You can create a mailbox in the Account Control Center of your hosting account.
- Log in to the Account Control Center (ACC)
- In the left sidebar, click E-Mail
- In the drop-down, click the Create New Mailbox tab
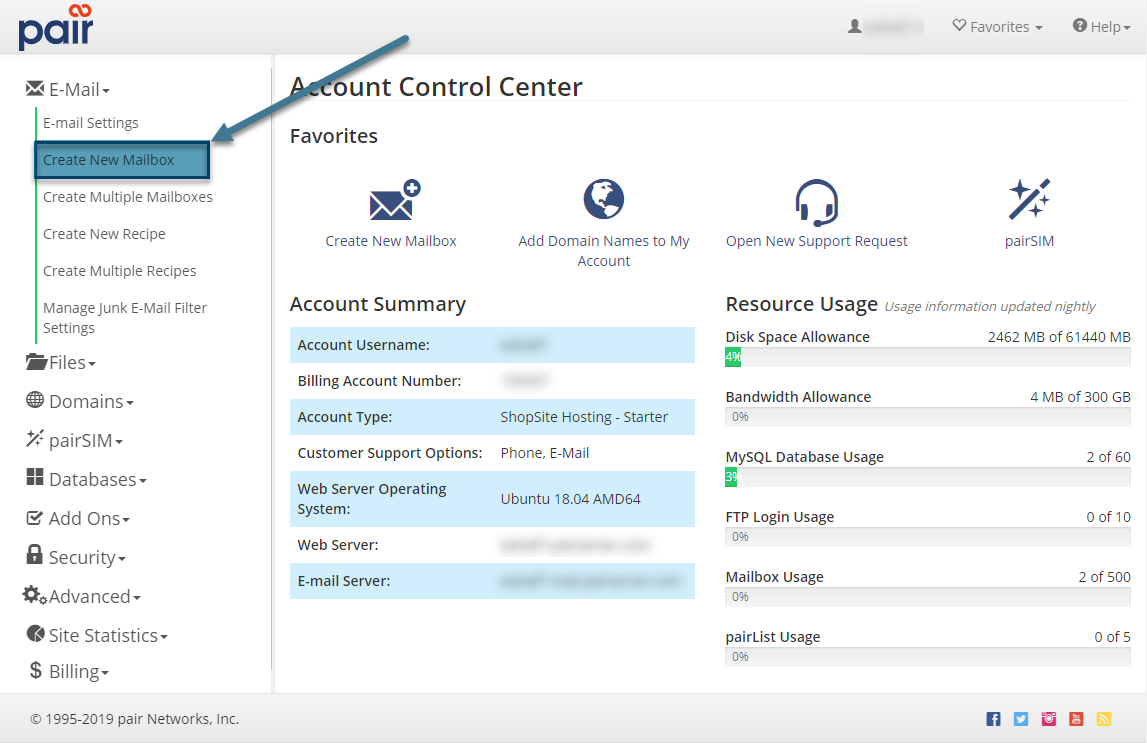
The Create Mailbox interface requires you to provide some information for the new mailbox.
When creating a new mailbox, you'll need to fill out a variety of fields:
The username is the first portion of your email address.
For example, if you were creating the email address [email protected], your username would be "jsmith."
In the Username field, there is also a spot for you to select a domain name to associate with the email address. The domain name will make up the latter part of the email (after the @ sign).
In the example above, the domain portion would be "example.com."
Click here for more information on mailbox usernames.
The password you set will be used to access this mailbox when logging in to Pair Networks webmail or an email client. Click here for more information on mailbox passwords.
During creation, you can specify a maximum size for your mailbox. Once specified, the mailbox will be unable to exceed the disk space specified. Many use this method when they are trying to conserve disk space on their hosting account. Click here for more information on mailbox sizes and file usage.
You have the option to use junk email filtering. By default, no junk email filtering is active for your mailbox. Click here for more information on junk email filtering.
Finally, when creating a new mailbox, you also have the option to list additional email addresses that will deliver to the mailbox you are creating. For example, if you are creating the mailbox "[email protected]", you might also want an address, "[email protected]", to deliver to the mailbox. To enter additional addresses that will deliver to the mailbox you are creating, click on Show More. In the form that is revealed, enter any additional addresses that should deliver mail to the mailbox you are creating.
When you're done choosing options for your new mailbox, click on the Add Mailbox button.
Creating Multiple Mailboxes at Once
If you want to create more than one mailbox at a time, you can do so. Just follow these steps:
- Log in to the Account Control Center (ACC)
- In the left sidebar, click E-Mail
- Then, in the drop-down, click Create Multiple Mailboxes
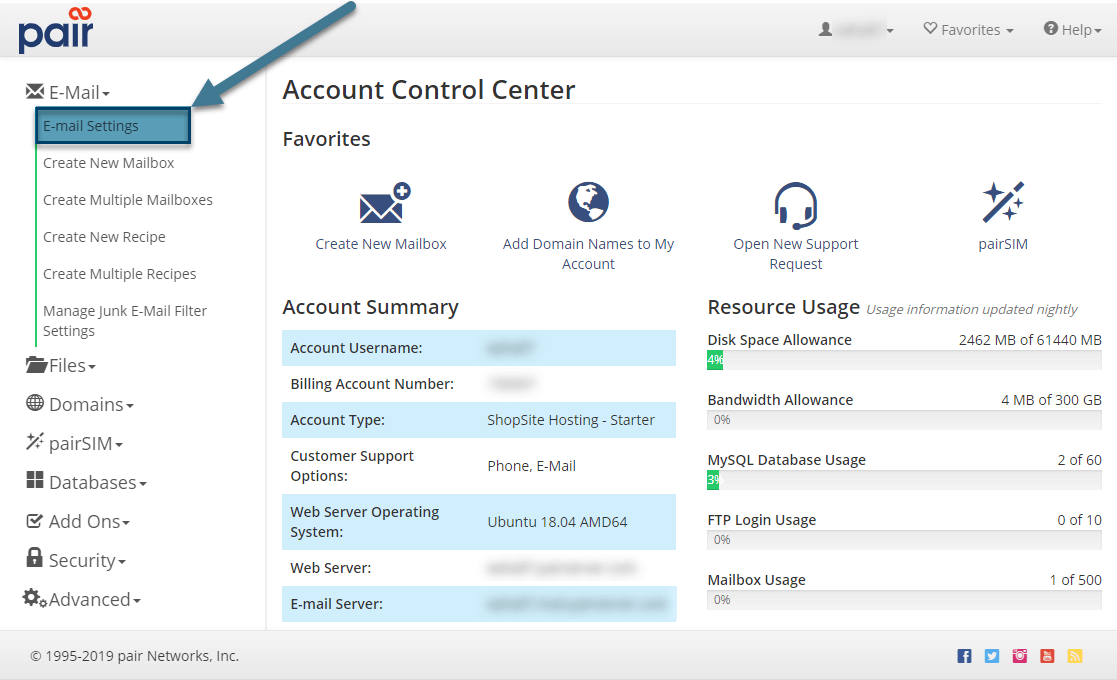
The Create Multiple Mailboxes interface requires you to provide three pieces of information for each mailbox you want to create.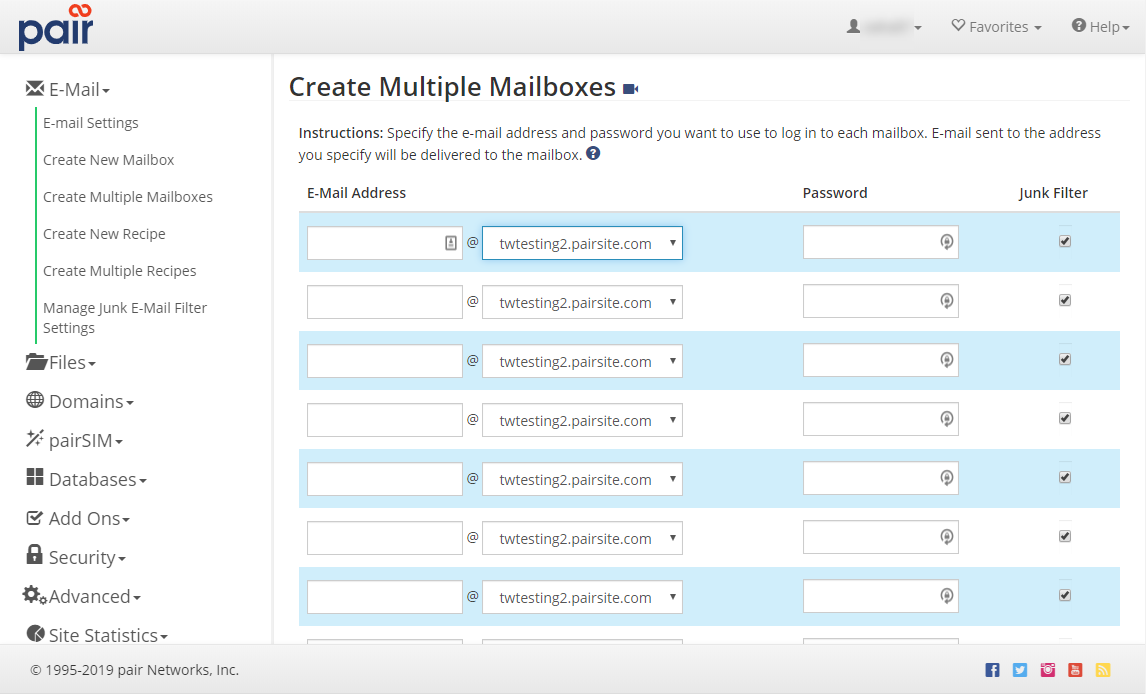
The username is the first portion of your email address.
For example, if you were creating the email address [email protected], your username would be "jsmith."
In the Username field, there is also a spot for you to select a domain name to associate with the email address. The domain name will make up the latter part of the email (after the @ sign).
In the example above, the domain portion would be "example.com."
Click here for more information on mailbox usernames.
The password you set will be used to access this mailbox when logging in to Pair Networks webmail or an email client. Click here for more information on mailbox passwords.
Choose whether to enable junk email filtering for the mailbox in question. If you enable junk email filtering, junk messages will be marked as junk but kept in your mailbox. Click here for more information on junk email filter settings.
When you are done entering information for all of the mailboxes you want to create, click on the Create Mailboxes button.
Editing Mailbox Settings
After a mailbox is created you can edit its settings, including the mailbox's maximum size, junk email filtering, and password.
To edit mailbox settings, visit the E-Mail section of the Account Control Center, as follows:
- Log in to the ACC (Account Control Center)
- In the left sidebar, click on the E-Mail tab
- In the drop-down, click Email Settings
- On the next page, click the Mailboxes currently configured link
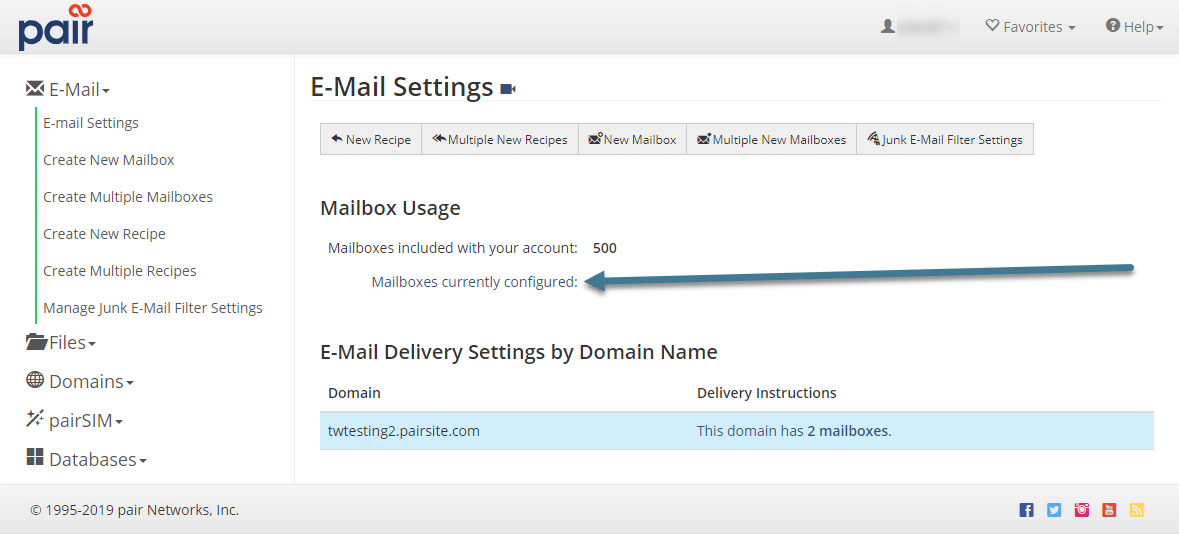
- Click on the name of the mailbox settings you wish to see
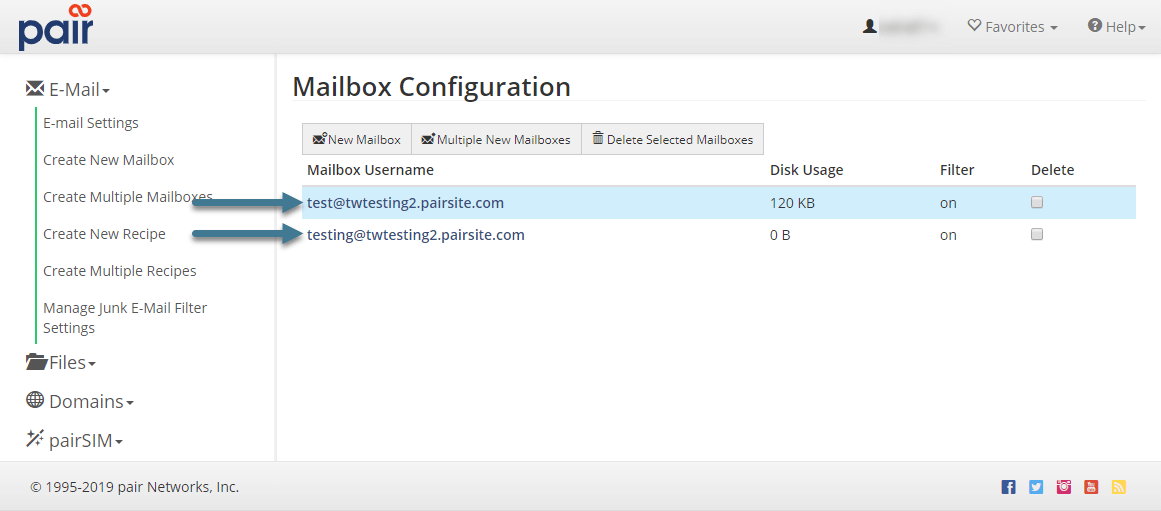
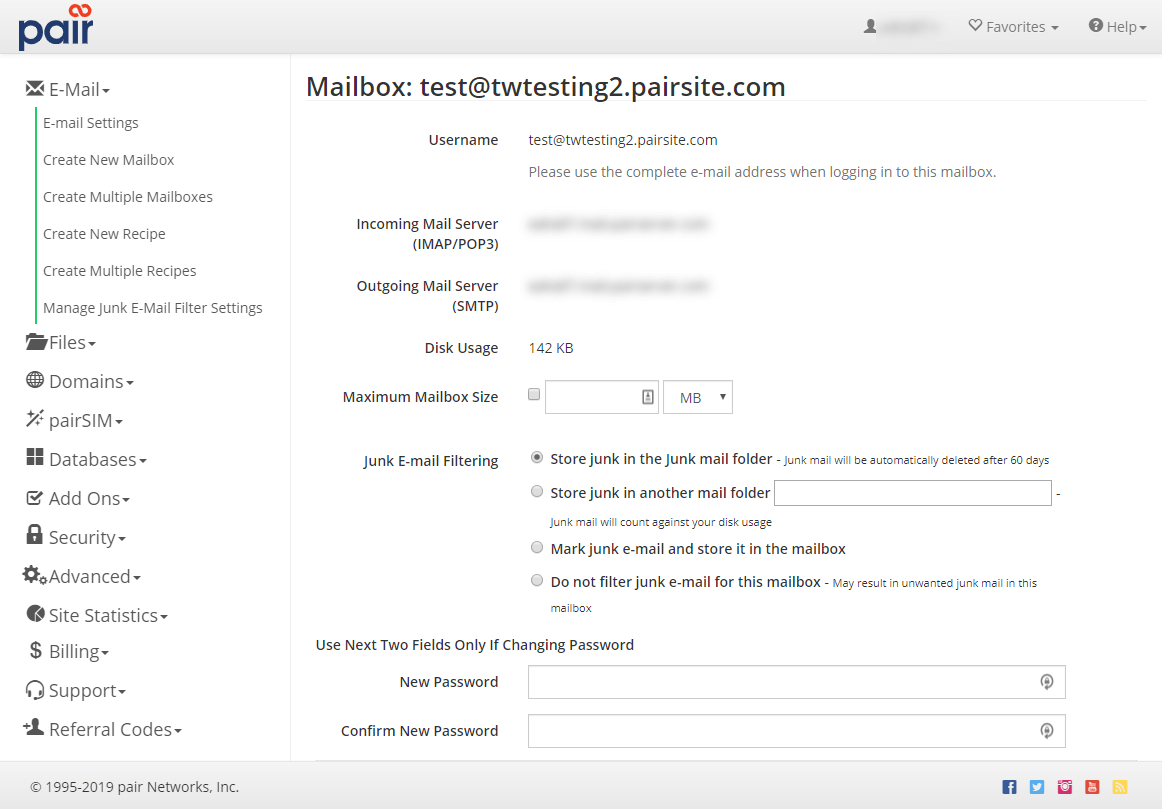
- On the individual mailbox settings page, you can see your mailbox information, as well as change various settings such as password and junk mail filtering.
Changing Mailbox Passwords
If you need to change a mailbox's password, you can do so by editing the mailbox's settings. Follow the instructions here on editing your mailbox's settings.
On the mailbox settings screen, enter the password you would like to change to. You do not need to know the mailbox's existing password in order to be able to change the mailbox's password.
Mailbox Settings in Detail
Mailboxes can be created on hosting accounts that have email hosting available. Shared, VPS, Dedicated, and WP Professional Plus hosting packages all have mailboxes included. If you have a WP Enthusiast or WP Professional package, you can enable email hosting as an add on.
Mailbox Username and Password Restrictions
The following restrictions apply to mailbox usernames:
| A mailbox username must contain at least one letter |
| A mailbox username must be 1 to 128 characters long, and may only consist of letters, numbers, dots, and underscores. |
| "default" is not a valid username |
The following restrictions apply to mailbox passwords:
| A mailbox password must be at least 8 characters long |
| Special characters, including spaces, are allowed for mailbox passwords |
| Passwords will be checked against a list of unsafe passwords (see below) |
We will reject passwords that match any entry on a list of unsafe passwords.
Passwords may be considered unsafe for a variety of reasons:
- they contain user-specific information;
- they contain references to pair Networks or its services;
- or they match passwords generally considered unsafe, such as password, 123456, etc.
Our list of unsafe passwords will change over time to stay updated on the latest security threats.
Maximum Mailbox Size
When creating or modifying a mailbox, you have the opportunity to set a maximum size for the mailbox. This means that if a mailbox is given a limited amount of disk space it may use. It will be enable to exceed that disk space limit. Limiting a mailbox is an option if you are trying to conserve the amount of disk space usage on your hosting account.
By default, no maximum size is set for mailboxes.
You can set a maximum mailbox size at the time of the mailbox's creation. You also have the opportunity to add, modify, or remove a maximum size for a mailbox after it is created.
Please note that mailbox usage is counted towards your disk space usage. Mailbox usage is recorded daily. At the end of each calendar month, your daily disk usage data is collected and averaged. The highest usage day is dropped from the mailbox calculation.
If you would like to see how much disk space your mailbox is currently using, see this tutorial about finding your email's disk space usage.
Junk Email Filtering
By default, no junk email filtering is active for your mailbox.
However, you can choose one of two filtering behaviors when creating or editing an individual mailbox:
Mark junk email and store it in the mailbox
This option flags junk messages but keeps them in your inbox. This is a good option if you are worried about missing legitimate messages, or if you use your email reader to separate junk email from real email.
Store junk in the Junk mail folder
This option moves junk messages to a separate folder, called Junk, in your mailbox. This is a good option if you are worried about junk messages cluttering up your inbox.
What You Need to Set Up a Mailbox on Email Clients
If you don't want to use our webmail interface to access your mailboxes, there are various email clients available for your use. We have a list of tutorials available for some popular email clients.
Check them out here: Popular Email Client Setup Tutorials
The mailbox settings interface in your hosting account displays information about your username and incoming/outgoing mail servers. You will need this information to set up an email client for use with your mailbox.
To find the mailbox settings interface see our tutorial above.
This will take you to that mailbox's settings page, which will display all of the information below that you will likely need for email client setup. 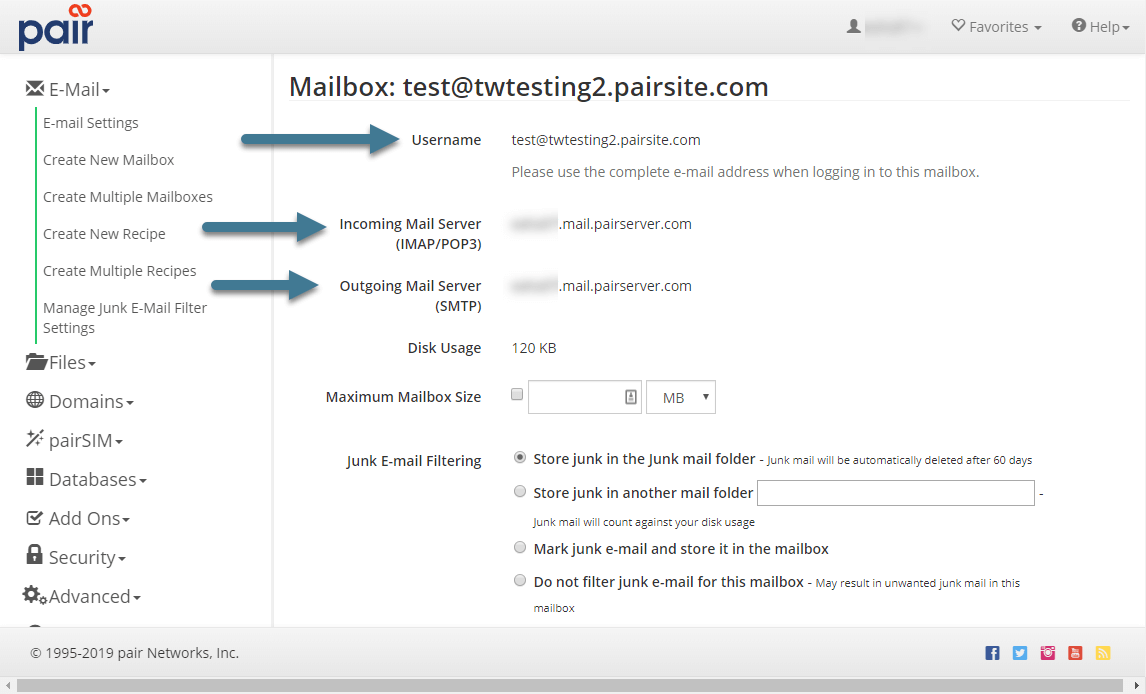
This is your complete email address you assigned to this mailbox. When the email client asks for the mailbox's username, you will fill use the email address as it appears in this section.
This server is your mailbox's incoming mail server. This server will be needed when filling out an email client's Incoming Mail Server or Incoming Server fields.
This server is used in your email reader's outgoing mail server settings.
In addition to the above three pieces of information, you'll need to know your mailbox's password. The mailbox's password is used for both your incoming and outgoing mail servers.
