Finding Information About Your Account Settings
If you need help finding your username and other configuration settings, see this article, Setting Up an Email Reader.
Setting Up your Email for Outlook 2013 on Windows 10
- Open the Outlook application on your computer.If you don't have any email addresses on your Outlook application yet, it will take you directly to set up. If you have other email accounts already configured, you will need to follow these steps:
- Click the File tab in the Outlook interface
- In the Info section, click Account Settings, then select Account Settings in the drop-down
- In the Email tab, click NewAfter completing these steps, skip to step 3.
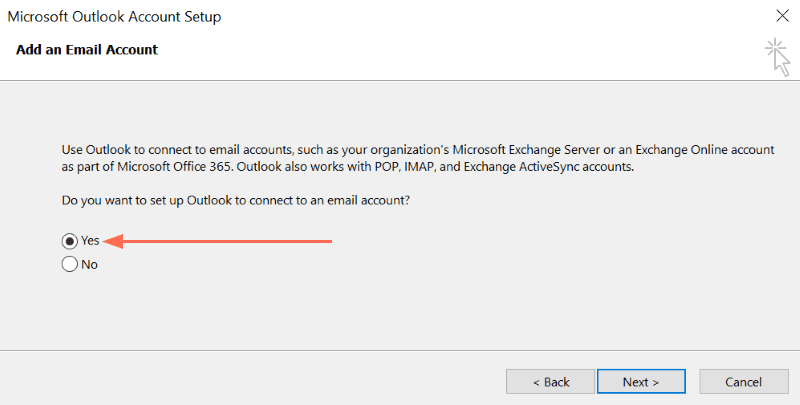
- Click Next on the welcome screen, then select Yes and click Next
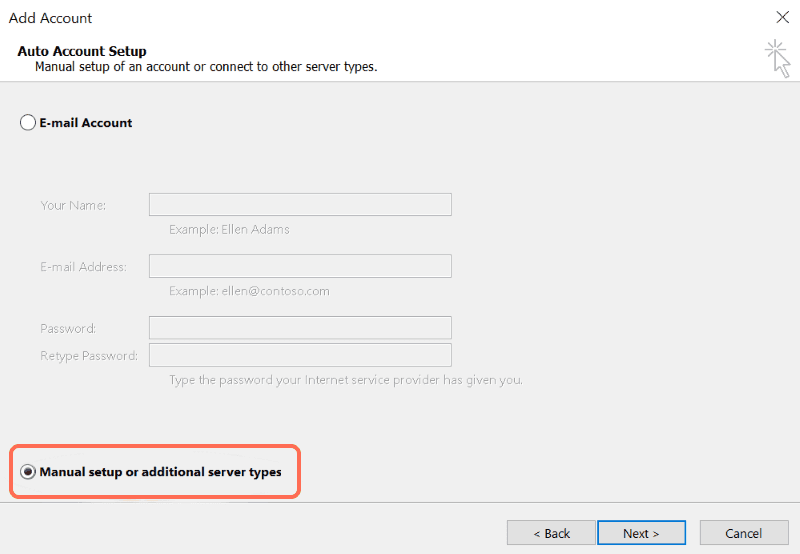
- Select the Manual Setup option, then click Next
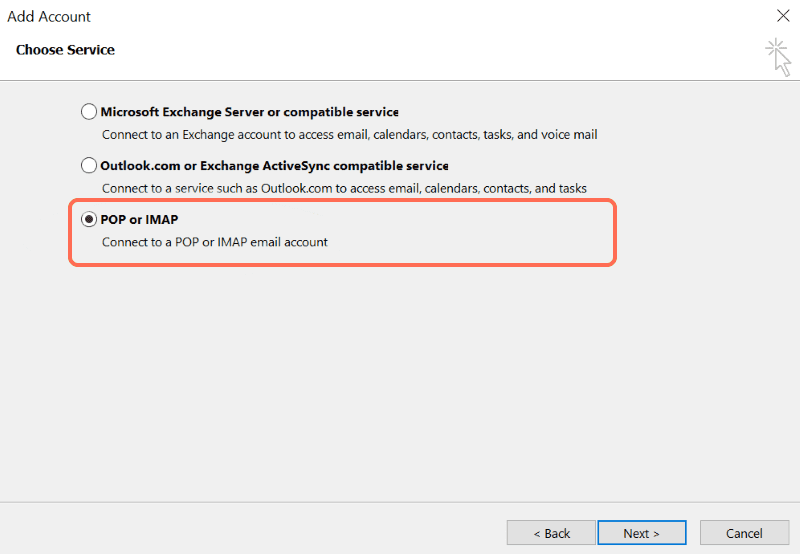
- Choose POP or IMAP as the service, then click Next. For more information see our IMAP or POP: Which One Should You Use? article
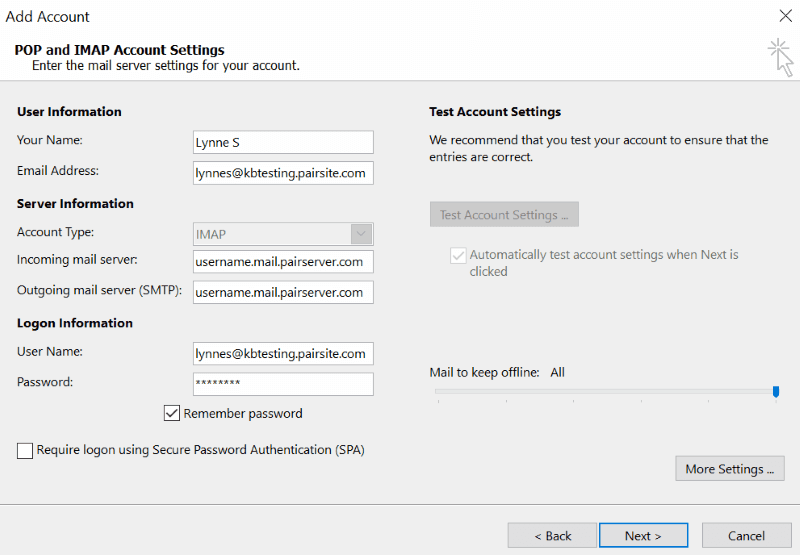
- On the next page, fill in the required information:
User Information Your Name Enter your name. This is the name that will be displayed with this account Email Address Enter the email address you are adding Server Information Incoming mail server This is the incoming email server for your custom mailbox Outgoing mail server This is the outgoing email server for your custom mailbox Login Information User Name Enter your custom email address. This will be the same as the email address you listed in the Email Address field Password Enter the password associated with your custom email address - On the same screen, click More Settings
- On the Outgoing Server tab, check the My outgoing server (SMTP) requires authentication box
- Select Use same settings as my incoming mail server
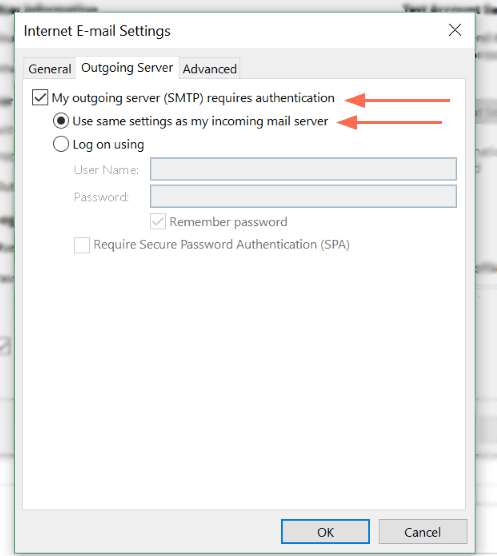
- Click on the Advanced tab
- Enter your preferred port numbers for incoming and outgoing settings:
Incoming Server Ports 993 Secure port for IMAP 995 Secure port for POP Outgoing Server Ports 587 or 465 Port for SMTP - For both incoming and outgoing server, go to Use the following type of encrypted connection and select SSL from the drop-down
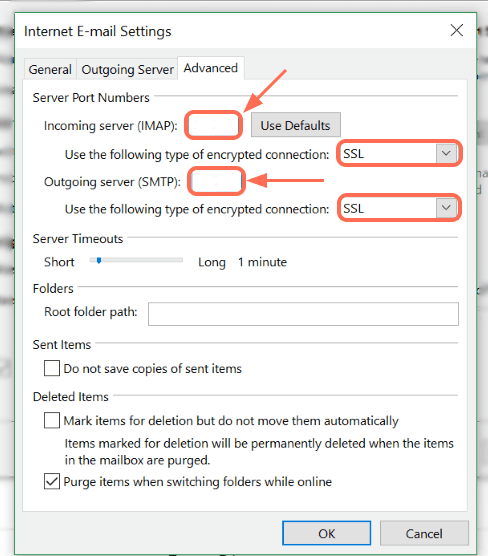
- Click OK
- Click Test Account Settings and make sure that the email has been properly configured
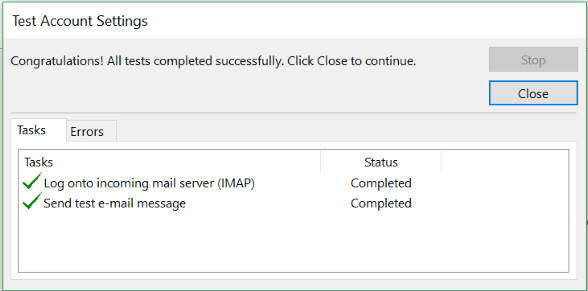
- When finished, click Next to finish
Using SSL to Secure Your Email
Pair Networks provides support for SSL/TLS and STARTTLS encryption for all IMAP, POP, and authenticated SMTP connections. Using encryption is an important way to prevent your password from being stolen.
POPS/IMAPS only secures the connection between your email reader and the mail server. Once it reaches the mail server, it will be in plain text. For additional security, you would need to encrypt the email message itself. The port for POPS is 995, the port for the IMAPS is 993, and the ports for encrypted authenticated SMTPAUTH are 465 and 587. These are the standard ports for these services, and you should not need to manually set them.
Please note that we replaced the secure certificate used to provide POPS, IMAPS, and SMTPS email services (sending and receiving email over SSL). Our SSL certificate vendor has changed to a new "root" certificate, which is recognized by most, but not all, email programs. If your email program begins returning errors and indicates that the server certificate is not recognized, please download the root certificate below and install it in your email program. The specifics of how to install a certificate will vary from program to program -- please consult the help files of your program for details.
Please also note that our mail servers use an SSL certificate. If you use this SSL option in conjunction with a domain name, your email reader may warn you that the domain names do not match. Some email readers will allow you to ignore this warning. In these cases, your incoming email will remain secure.
However, some email readers will not let you proceed if the security certificates do not match. If this occurs, please verify your incoming server settings as follows:
For accounts created prior to June 1, 2011:
mailX.pair.com
(where X is your server number)
For accounts created on or after June 1, 2011:
username.mail.pairserver.com
(where "username" is your main account username)

