You can use your Pair custom email on a Gmail account. This will allow you to use the Gmail interface while receiving and sending email for the Pair custom email.
Step 1: Create a Gmail Address
Create a Google Account by going to Google’s sign-up page and filling out the form. Be sure to remember the login credentials.
If you already have a Gmail account, proceed to Step 2: Create a Mailbox in the ACC.
Step 2: Create a Mailbox in the ACC
Next, you need a custom mailbox in the Account Control Center (ACC). You can either create a new one or use an existing one.
To find your existing mailboxes:
- Log into the Account Control Center (ACC)
- Click E-Mail in the left sidebar
- Click E-mail Settings in the drop-down
- Under Mailbox Usage, click Mailboxes Currently Configured
- Choose a mailbox from the list to use
- You can click on the mailbox’s name to see the mailbox’s information
Step 3: Give Gmail Access to Your Pair Email
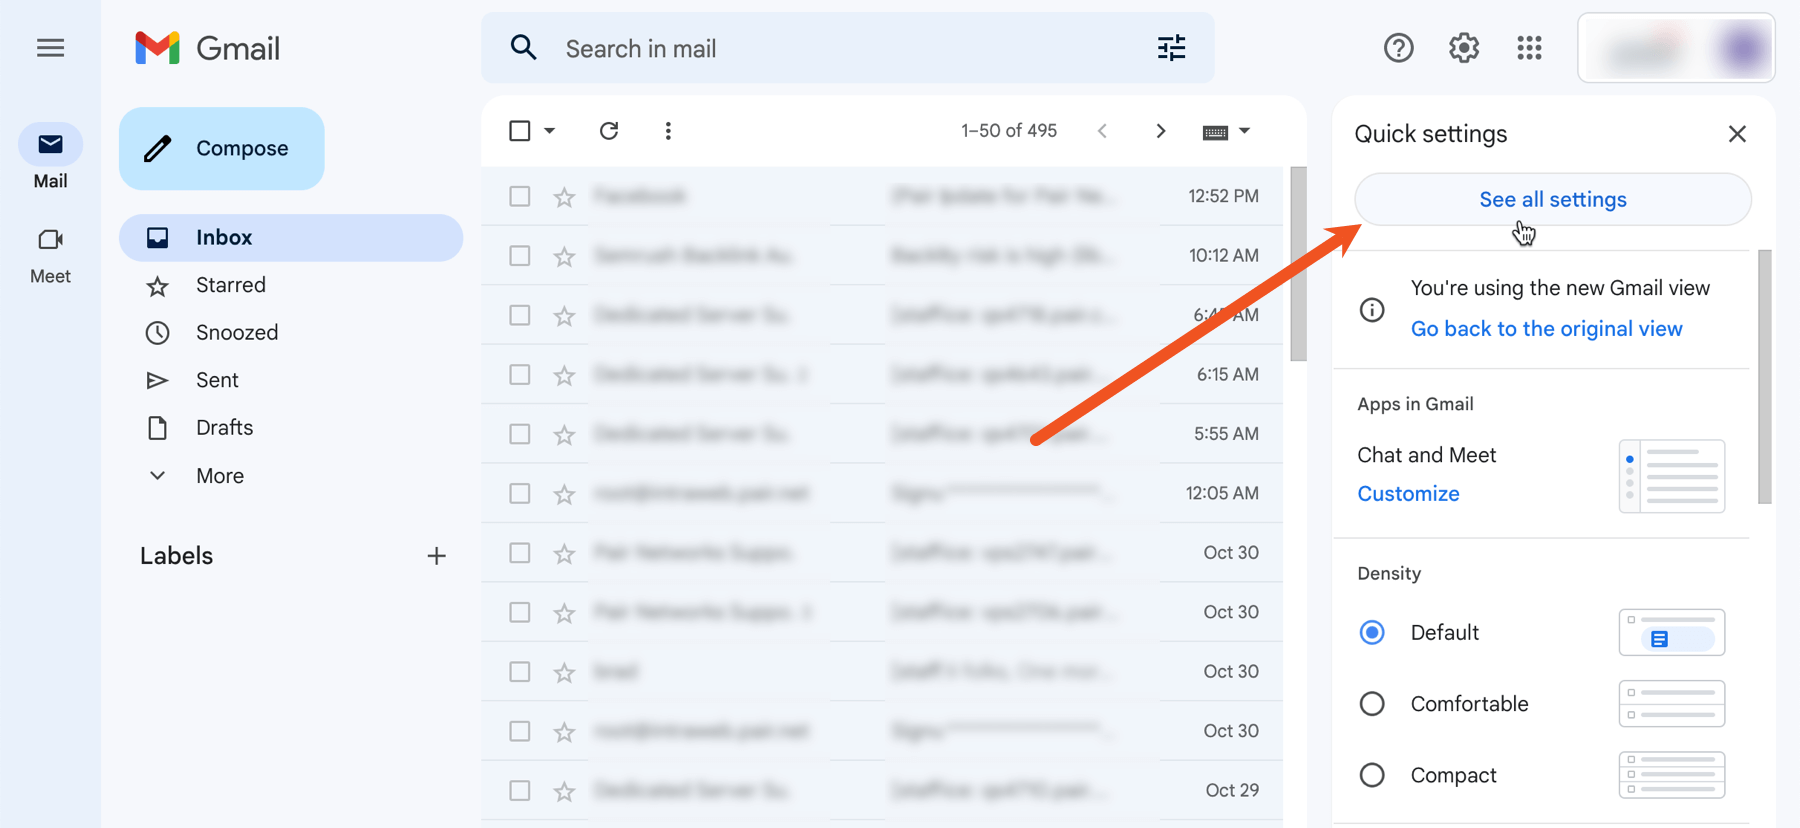
- Log in to your Gmail account
- Click the cog icon

- In the drop-down, click See all Settings
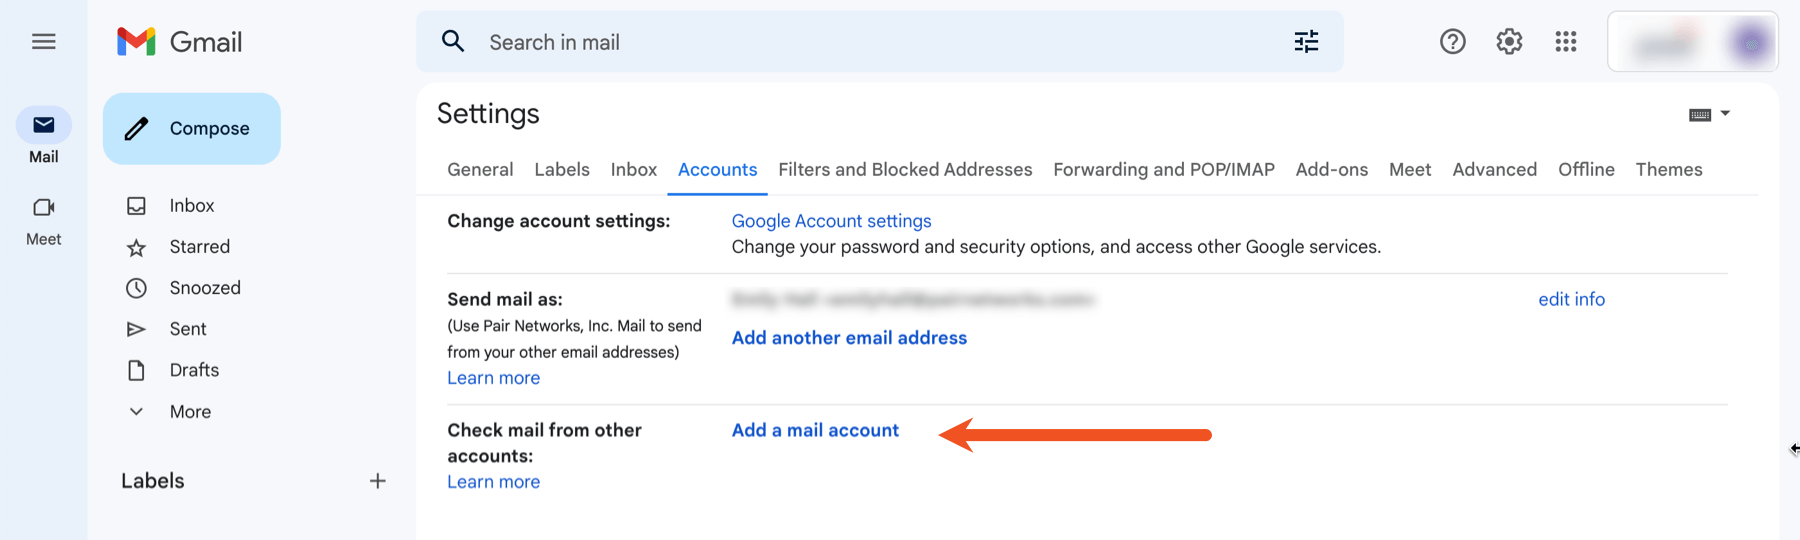
- Click the Accounts and Imports tab
- Next to Check email from other accounts, click Add a mail account
- Next to Email Address, enter your Pair email address

- Click Next
- Select Import emails from my other account (POP3), then click Next
- In the next window, input your:
- Username: This will be the same as your email address.
- Password: Enter the password associated with this mailbox. Note, this is not the same as your ACC password.
- POP Server: This will be username.mail.pairserver.com. Replace username with your ACC username.
- Port: Select 995

- Check the box next to Always use a secure connection (SSL) when retrieving mail
- Click Add Account
If you want to be able to send mail as your custom email from the Gmail interface, continue on to Step 4.
If you only want to receive emails in the Gmail interface, you may click No on the next screen to finish the setup.
Step 4: Enable Gmail to Send Mail as Your Custom Email
If you want responses sent from your Gmail account to show they are from your custom email, you must enable Gmail to send mail for your custom email.
- Select Yes, I want to be able to send mail as [custom email].
If not, select No. - Click Next
- In the pop-up box, enter your name. This name will appear as the sender in your email messages.
- Check the box next to Treat as Alias, then click Next Step

- Input your:
- SMTP Server: This will be "username.mail.pairserver.com" Replace "username" with your Pair account username.
- Username: This will be the ACC mailbox address, such as [email protected].
- Password: This is the password for the mailbox. Note that this is not the same as your Pair account password.
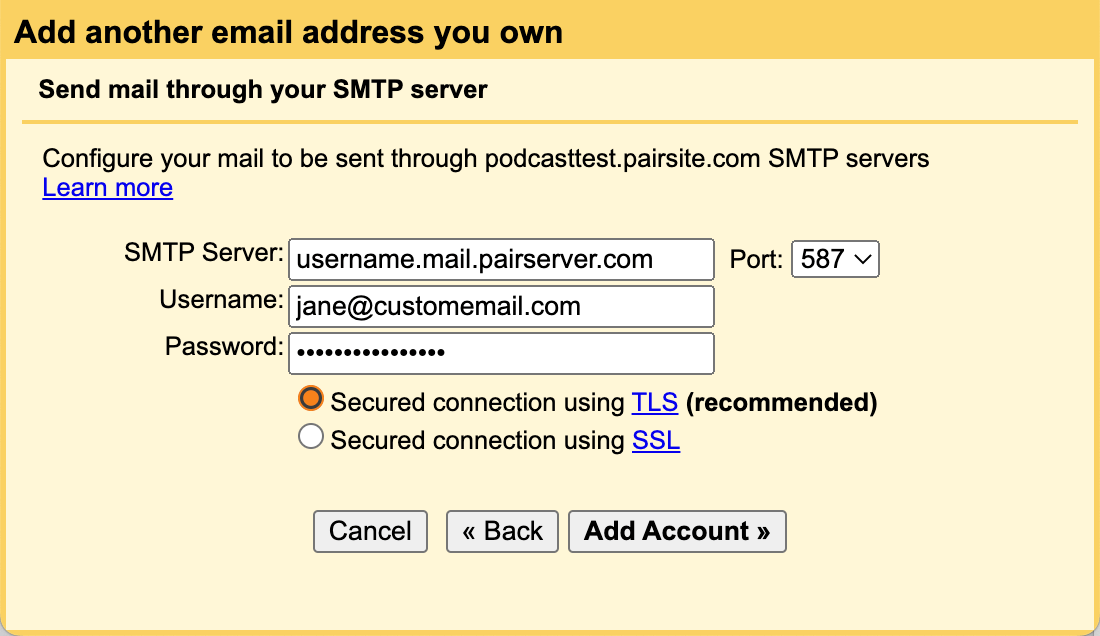
- Fill out the rest of the form, then click Add Account
- You will be asked to confirm your custom email address. To check your mailbox, log in to webmail at rc.webmail.pair.com/ using your mailbox credentials.
- Once your email has been verified, return to the Account and Import section of Gmail Settings
- Go to the Send mail as section and, next to your ACC email, click make default
- Under Replying to a message, select whether you want the Reply from the same address to which the message was sent or Always reply from the default address
Now you can send and receive mail from your ACC email address through your Gmail account interface.
Troubleshooting: Gmail isn’t receiving emails from my custom email
Gmail may use the POP method to get your mail. When Gmail does this, it sometimes filters the messages into the “All Mail” folder instead of the Inbox.
If your emails are going astray, check the Google account’s “All Mail” folder to see if this is the issue.