Shared VPS Dedicated WP Enthusiast WP Professional WP Professional Plus
You can add Let’s Encrypt to your domain in the Account Control Center (ACC) interface.
Adding Let’s Encrypt to a Domain
- Log into the Account Control Center (ACC)
- Click Security
- Click Manage Your SSL
- Click Let's Encrypt for the site you wish to add Let's Encrypt on
- Then click Enable Let's Encrypt
This will request a Let’s Encrypt certificate for the domain. Once a certificate is requested, the message, “Let's Encrypt: Certificate Requested” will appear over the Let’s Encrypt button. You may navigate away from this page. The process will proceed whether you are on the page or not.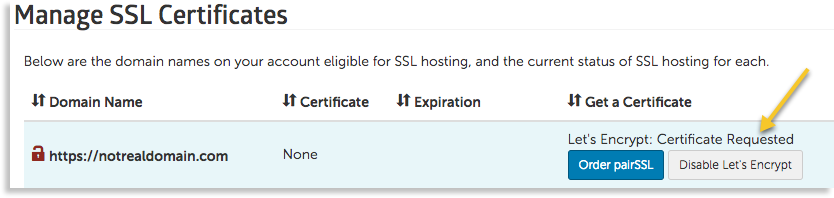
Once the request has been processed, Let’s Encrypt will try to install on your domain. This may take several tries. When this step is reached, the message above the Let’s Encrypt button will change to, “Let’s Encrypt: Certificate Pending (number of tries)”. The “number of tries” will be replaced with the number of times Let’s Encrypt has tried to install on your domain.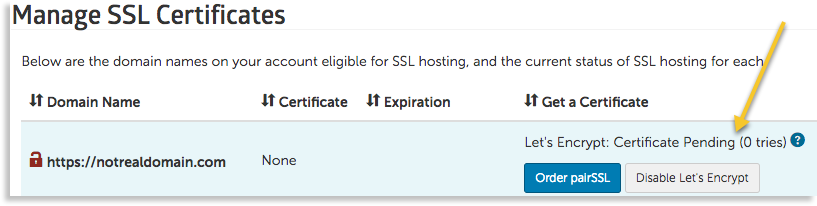
After ten unsuccessful attempts, the process will stop. You can restart the process by disabling and re-enabling Let’s Encrypt on the domain.
Once the Let’s Encrypt certificate has been successfully installed, the message will disappear and instead show you that Let’s Encrypt is installed on your domain and that it is set to renew automatically.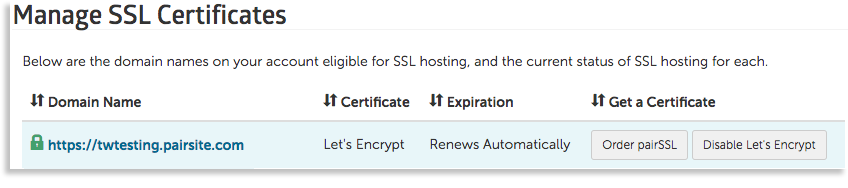
You can disable Let’s Encrypt at any time.