WP Enthusiast WP Professional WP Professional Plus
Adding Let’s Encrypt to a Domain
Adding Let’s Encrypt to your WordPress site follows the same process as adding Let’s Encrypt to your non-WordPress domains.
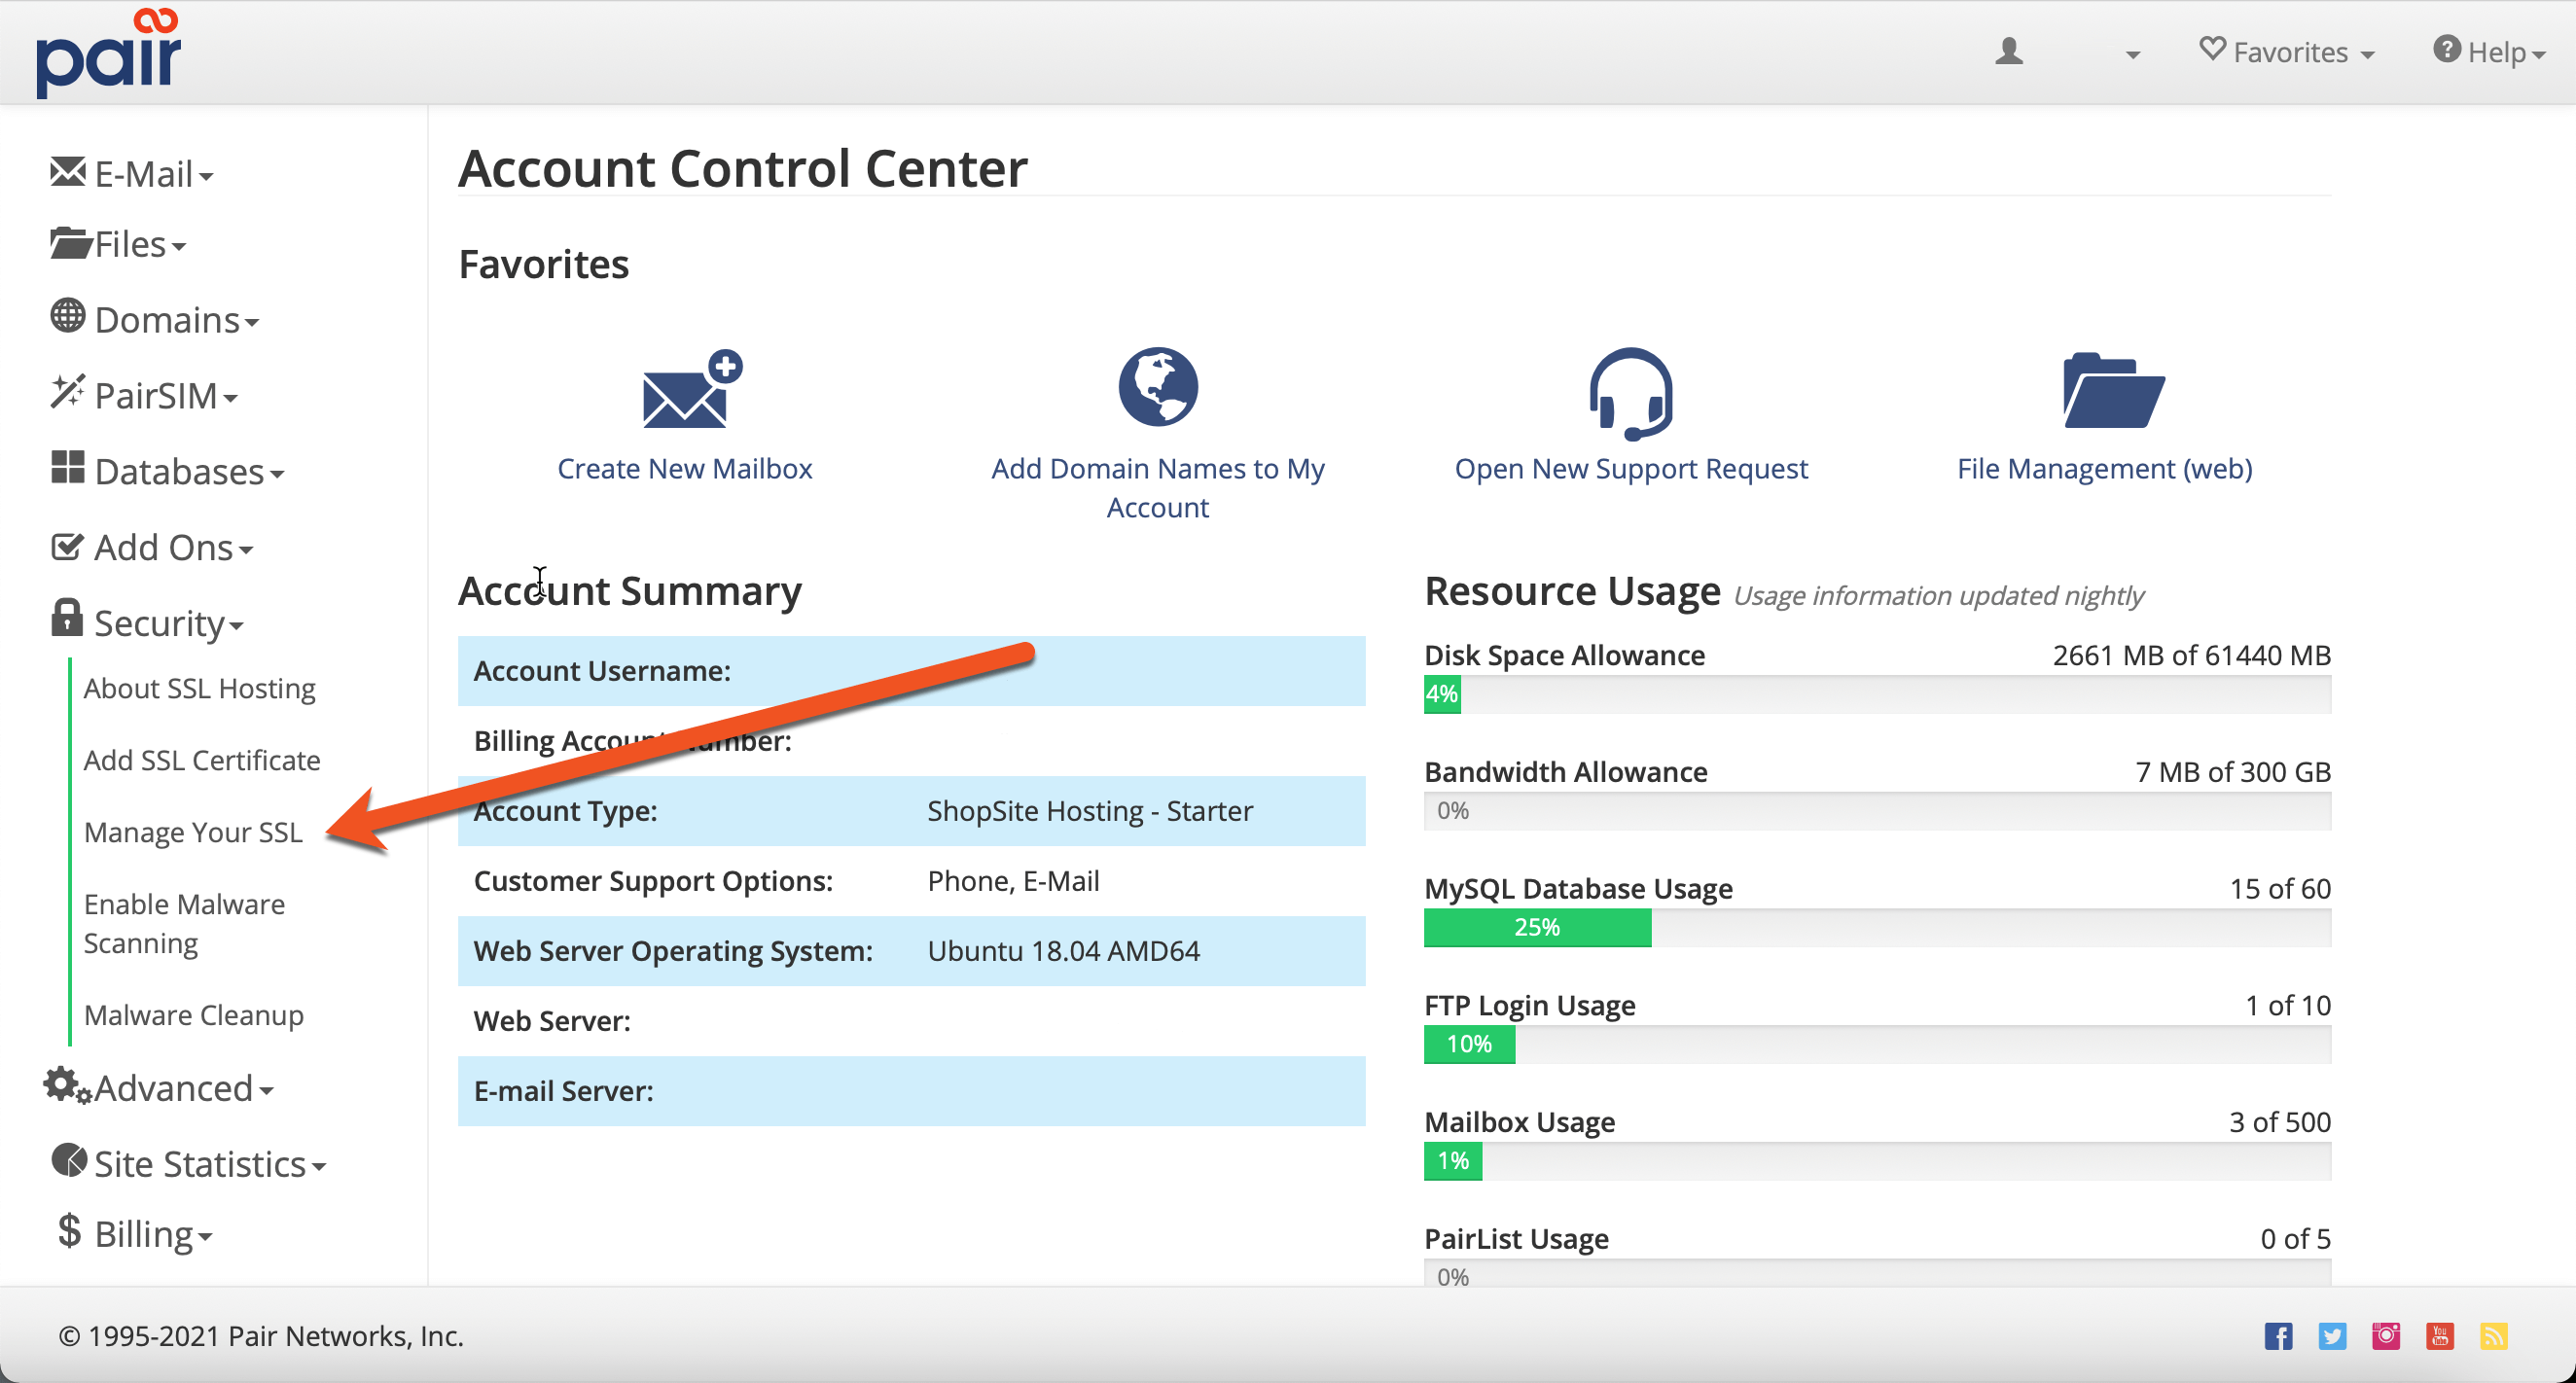
- Log in to the Account Control Center (ACC)
- In the left sidebar, click Security
- In the drop-down, click Manage Your SSL
- Find your domain name in the list of domains and click its Let’s Encrypt button
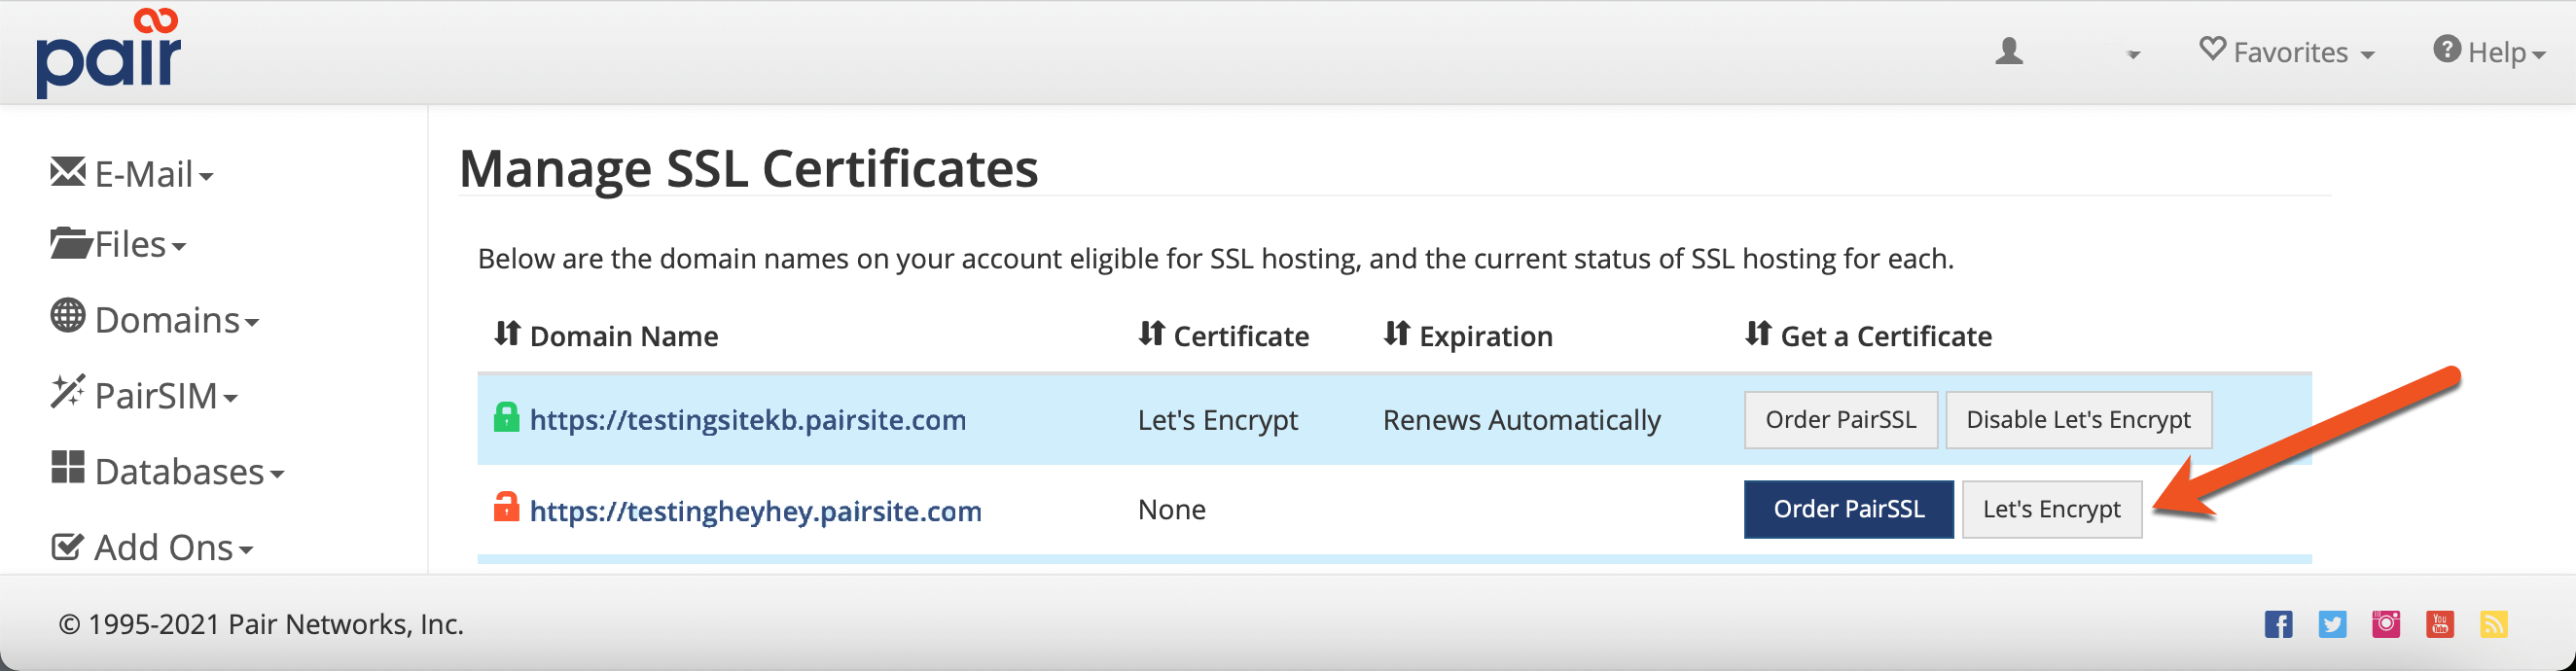
- Click Enable Let’s Encrypt
This will request a Let’s Encrypt certificate for the domain. Once a certificate is requested, the message, “Let's Encrypt: Certificate Requested” will appear over the Let’s Encrypt button.
You may navigate away from this page. The process will proceed whether you are on the page or not.
If a certificate has been issued successfully, a green lock will appear next to the domain name. Once a Let's Encrypt certificate has been issued successfully, you can move on to the next steps.
After Adding Let's Encrypt
After you have successfully added Let’s Encrypt to your WordPress domain, there are two more steps you may need to take:
- Updating Your WordPress Database Links
- Updating Your WordPress Address URL
Update Your WordPress Database Links
We recommend updating all links in your database to https. This can be accomplished by using a plugin, like Velvet Blues, or via the wp-cli command line tool.
Note: It is important that you do not modify any https links in the guid column.
Update Your WordPress Address URL
This step may be unnecessary if you are using a WP Enthusiast or WP Professional hosting account. However, even on these accounts, you may need to complete this step if you have internal links on your site that are using http instead of https. Double check your internal links if you are unsure whether to proceed.
However, if you are not using a WP Enthusiast or WP Professional hosting account, this is a required step.
To update your site address, you need to change the WordPress Address URL and Site Address URL in your WordPress editor. To make the change, follow these steps:
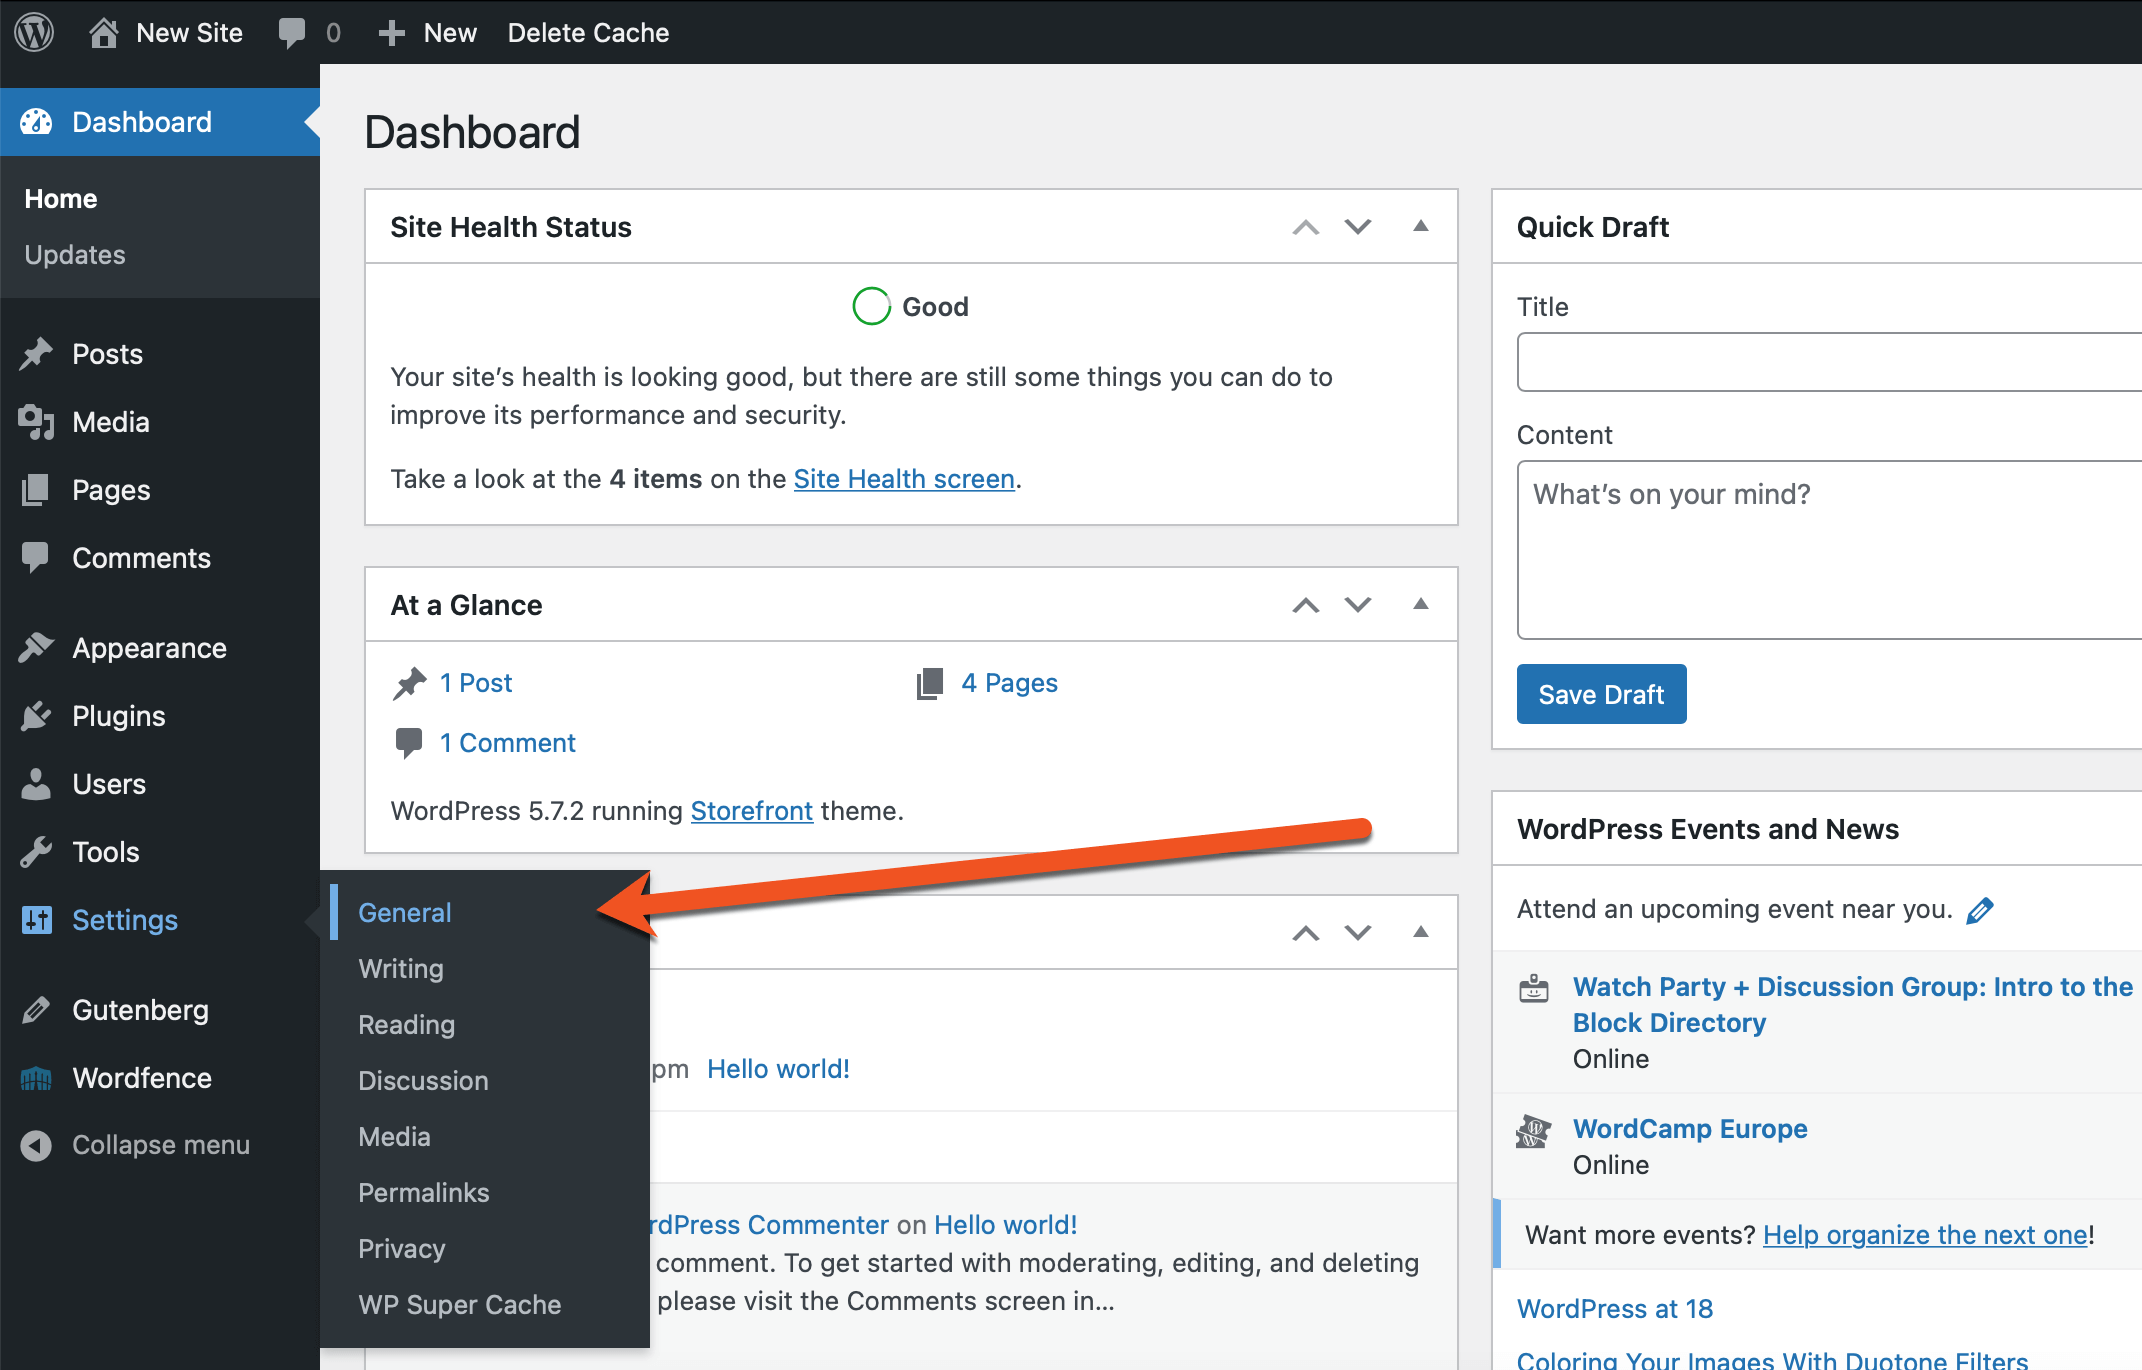
- Log into your WordPress admin interface
- At the bottom of the left sidebar, hover over the Settings tab
- In the drop-down, click General
- In the fields next to WordPress Address (URL) and Site Address (URL), add a ‘s’ to ‘http’
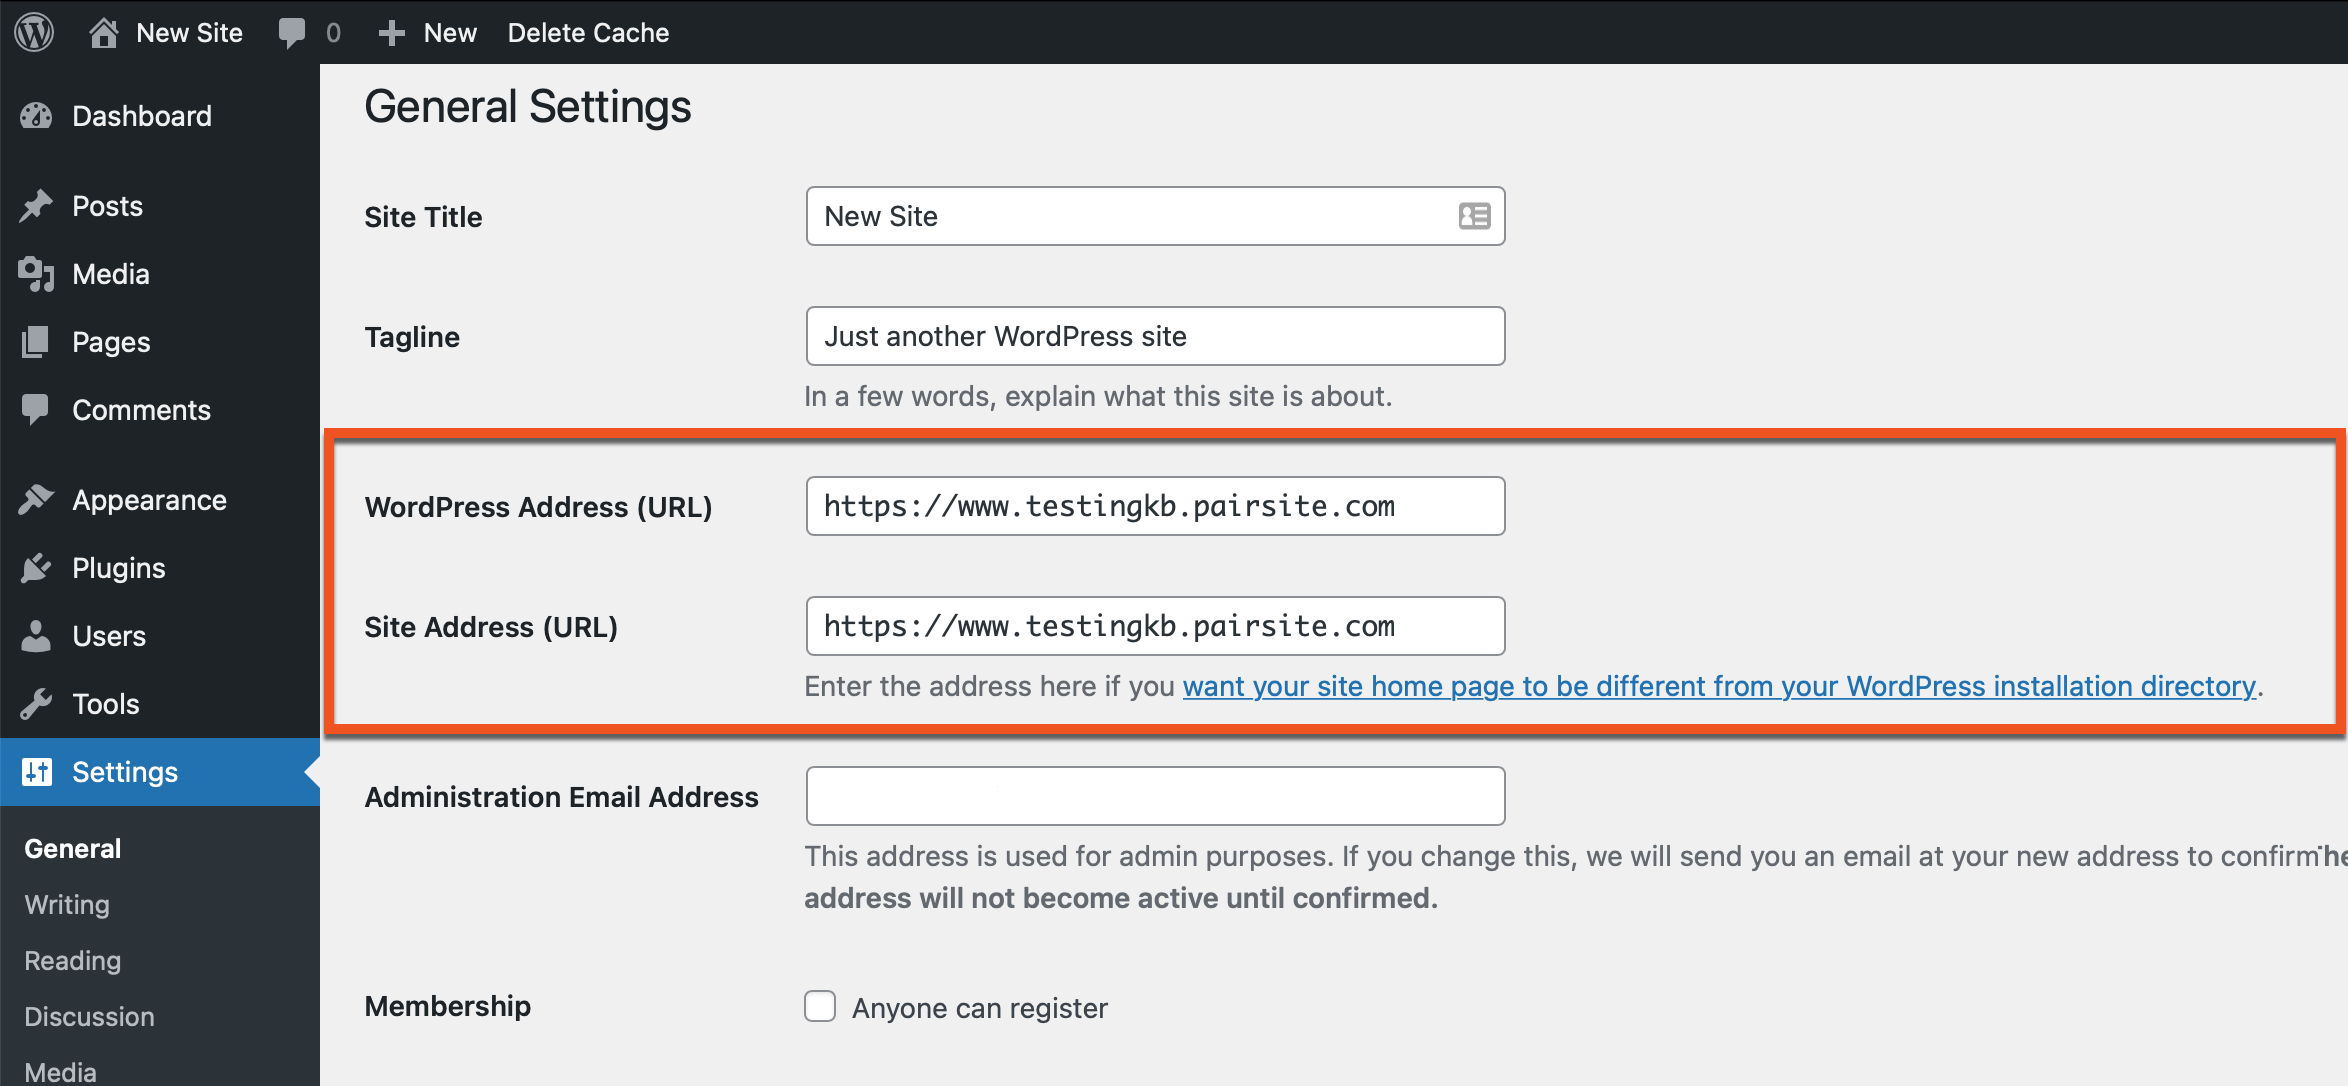
- Scroll to the bottom of the page and click the Save Changes button
After you have taken these steps, your site will begin to use SSL, thus making the connection between your site and its visitors more secure.