What is Blacklisting?
Blacklisting is a way to reject emails based on a condition. For example, you may blacklist an email from a certain address or with a certain word in the subject line. Blacklisting is typically used as a way to keep spam from making it into your account.
You can set up a blacklisting rule ahead of time. If you were, for example, to set up a rule to block all messages that have “cat” in the subject, any message that had the word “cat” would be marked as junk. Your mailbox will then deal with the junk based on the mailbox’s settings.
However, blacklisting operates by using the string version of a word, not the word itself. So if a word in the subject line or address contains the blacklisted string, it will also be rejected. To follow the earlier example, if the subject was “Catch you later,” the email would be marked as spam because the string “cat” appears in “catch.”
So be sure to use blacklisting with care, so you don’t accidentally mark valid emails as junk.
How do I Blacklist Subjects in the ACC?
You can set up blacklisting rules directly on your mailboxes in the Account Control Center (ACC).
- Log in to the ACC
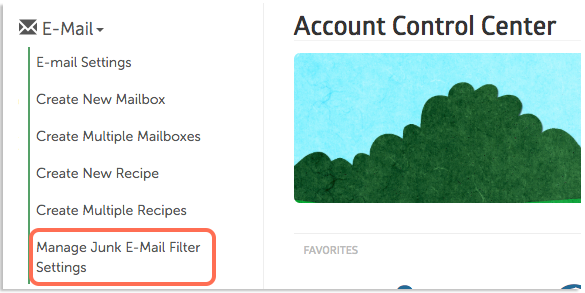
- Click E-Mail in the left sidebar, then click Manage Junk E-Mail Filter Settings
- Scroll to Additional Junk E-Mail Filtering Options section at the bottom of the page
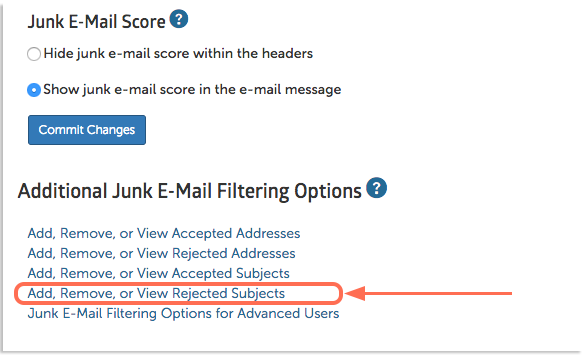
- Click Add, Remove, or View Rejected Subjects
There are two different ways you can add rejected subjects.
Add a Single Rejected Subject
In the first section, under the Add Rejected Subjects header, you can add a single subject string that should be rejected. Next to Rejected Subjects, enter the string into the field. You can add any additional comments in the field next to Comments.
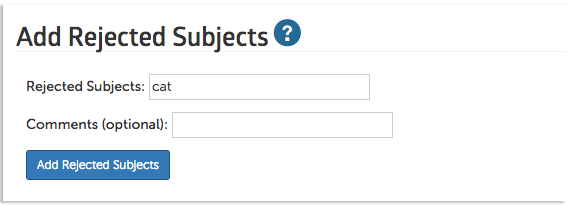 Once completed, click the Add Rejected Subjects button. The string will appear under the E-mail sent with these subjects will be marked as “Junk” header.
Add a List of Rejected Subjects
You can add a list of Rejected Subjects in the section, under the Upload a list of Rejected Subjects header. Click the Choose File button and select a file with a list of rejected subject strings.
The file should be in plain text, with each rejected subject string on its own line.
When the file has been added, click the Upload button. If the file is formatted correctly, the new rejected subjects will be added to the list under the last header, E-mail sent with these subjects will be marked as “Junk” header.
How to Remove Rejected Subjects
If you no longer want a subject on the list to be rejected, you can remove it from the rejected subject list under E-mail sent with these subjects will be marked as “Junk” header.
Check the box next to the subject(s) you would like to remove, then click the Remove Selected button at the bottom of the list.
If you would like to delete all rejected subjects from the list, check the box next to Check All, then click the Remove Selected button.
Once you have chosen the subject(s) to delete, you will be taken to a confirmation page. To confirm, click the Confirm Deletion button.
Once subjects are deleted from the list, they will no longer be automatically marked as junk.