WP Enthusiast WP Professional WP Professional Plus Podcast Websites
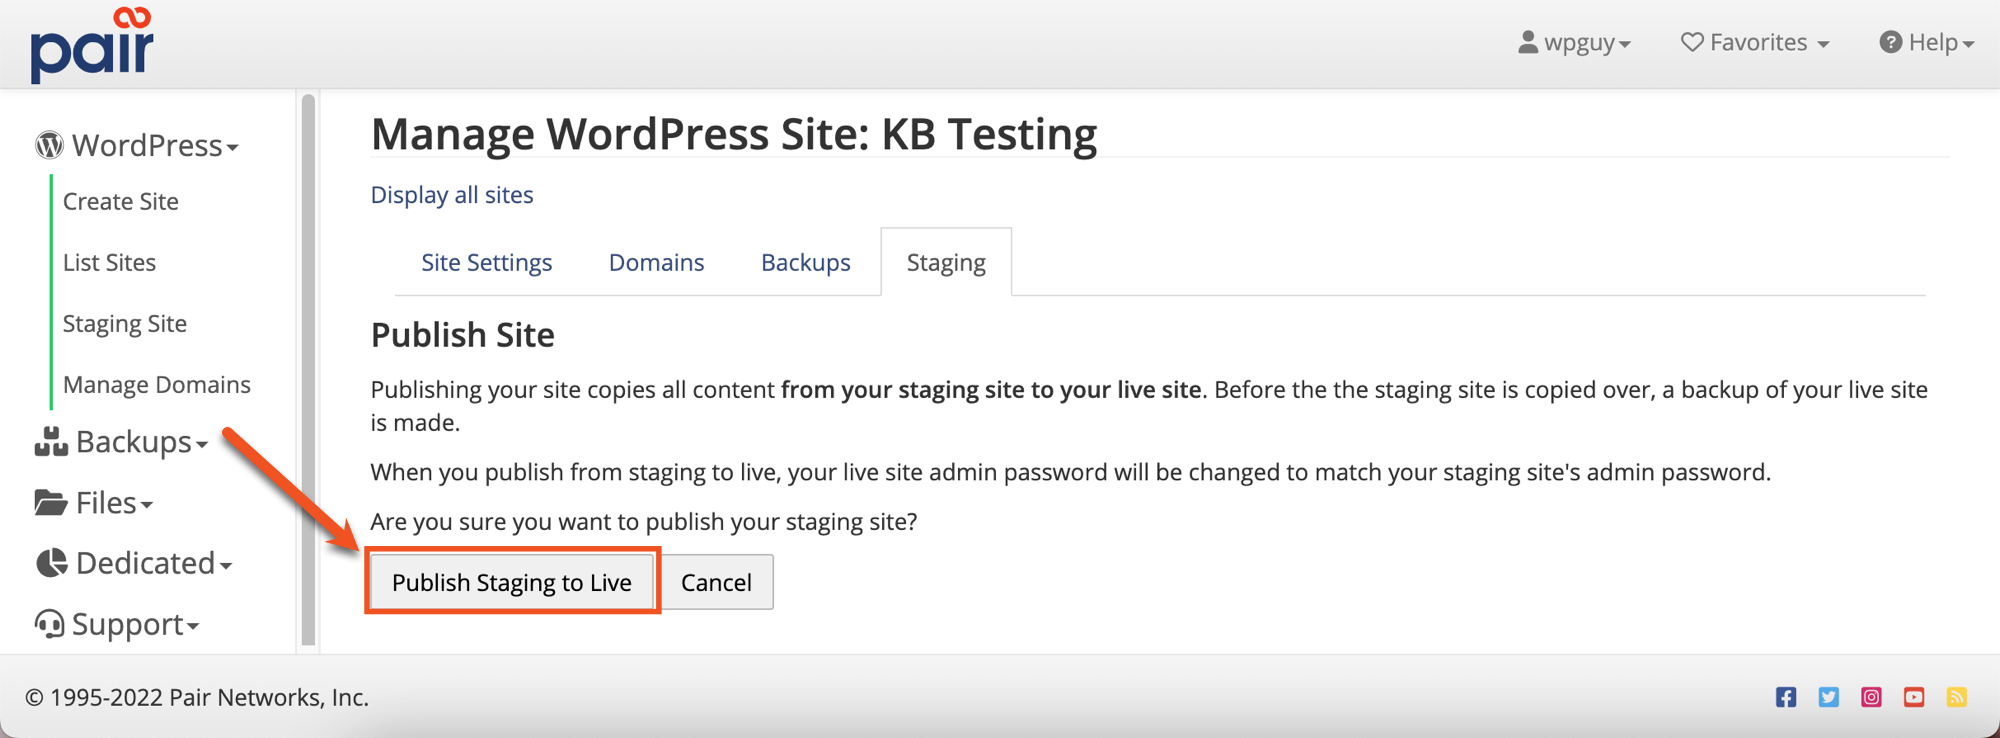
Satisfied with your changes to the staging site and want to make it your live site? You can move your staging site to your live site by publishing it. This will copy your staging site’s data onto your live site. However, before the site data is copied over, a backup is made of your live site’s data. This is in case you need revert to your previous live site.
Moving Your Staging Site to Your Live Site
If you want to move your staging site to your live site, follow these steps:
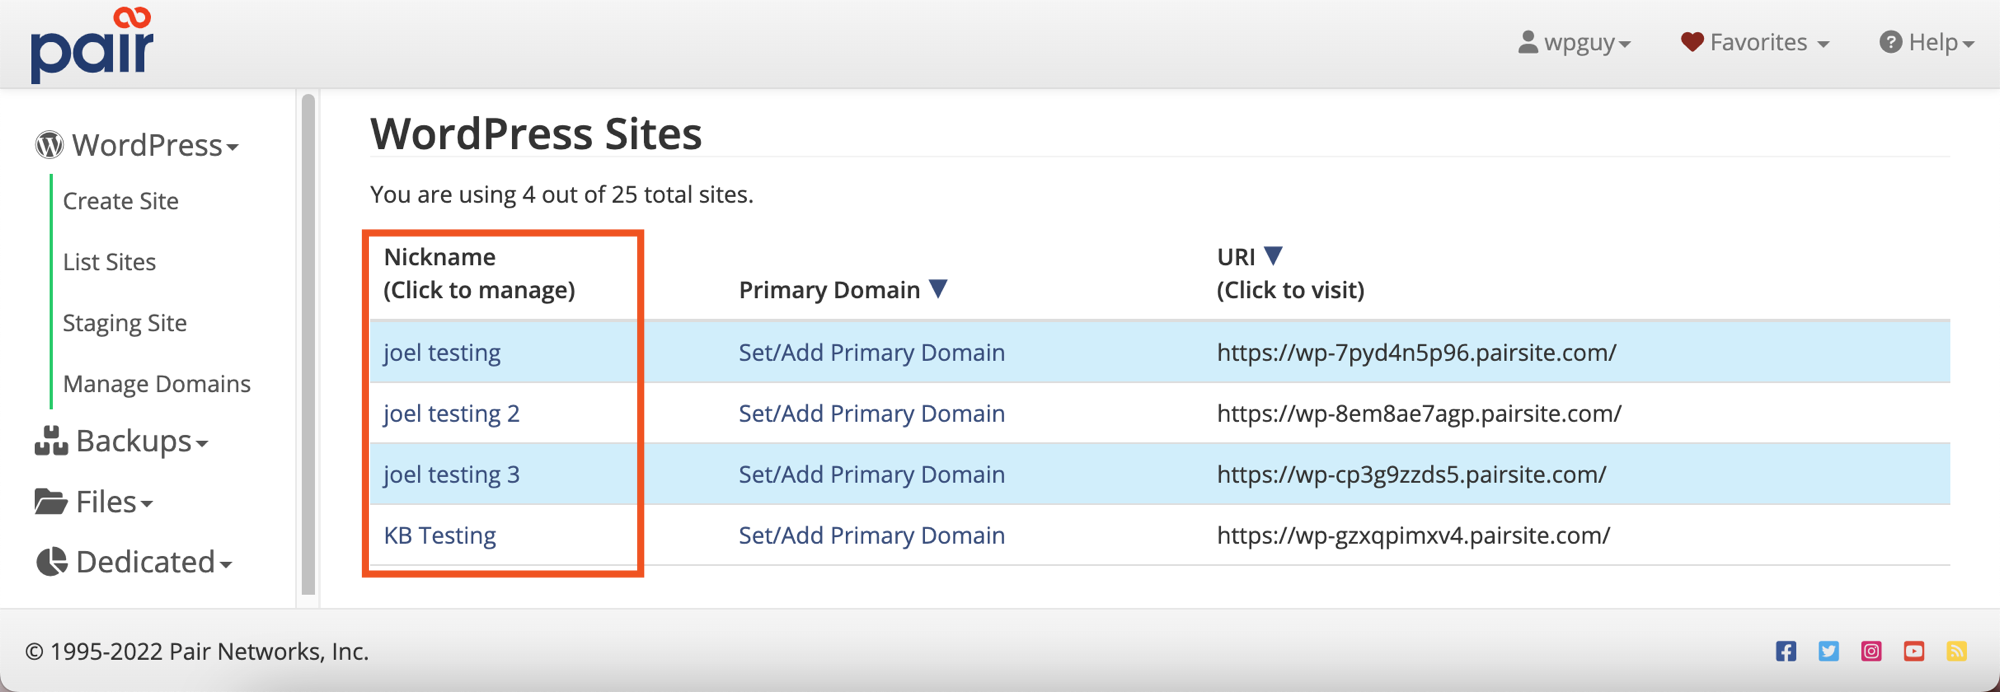
- Log in to the Account Control Center (ACC)
- Click WordPress in the left sidebar, then click List Sites in the drop-down
- Click the Nickname of your site
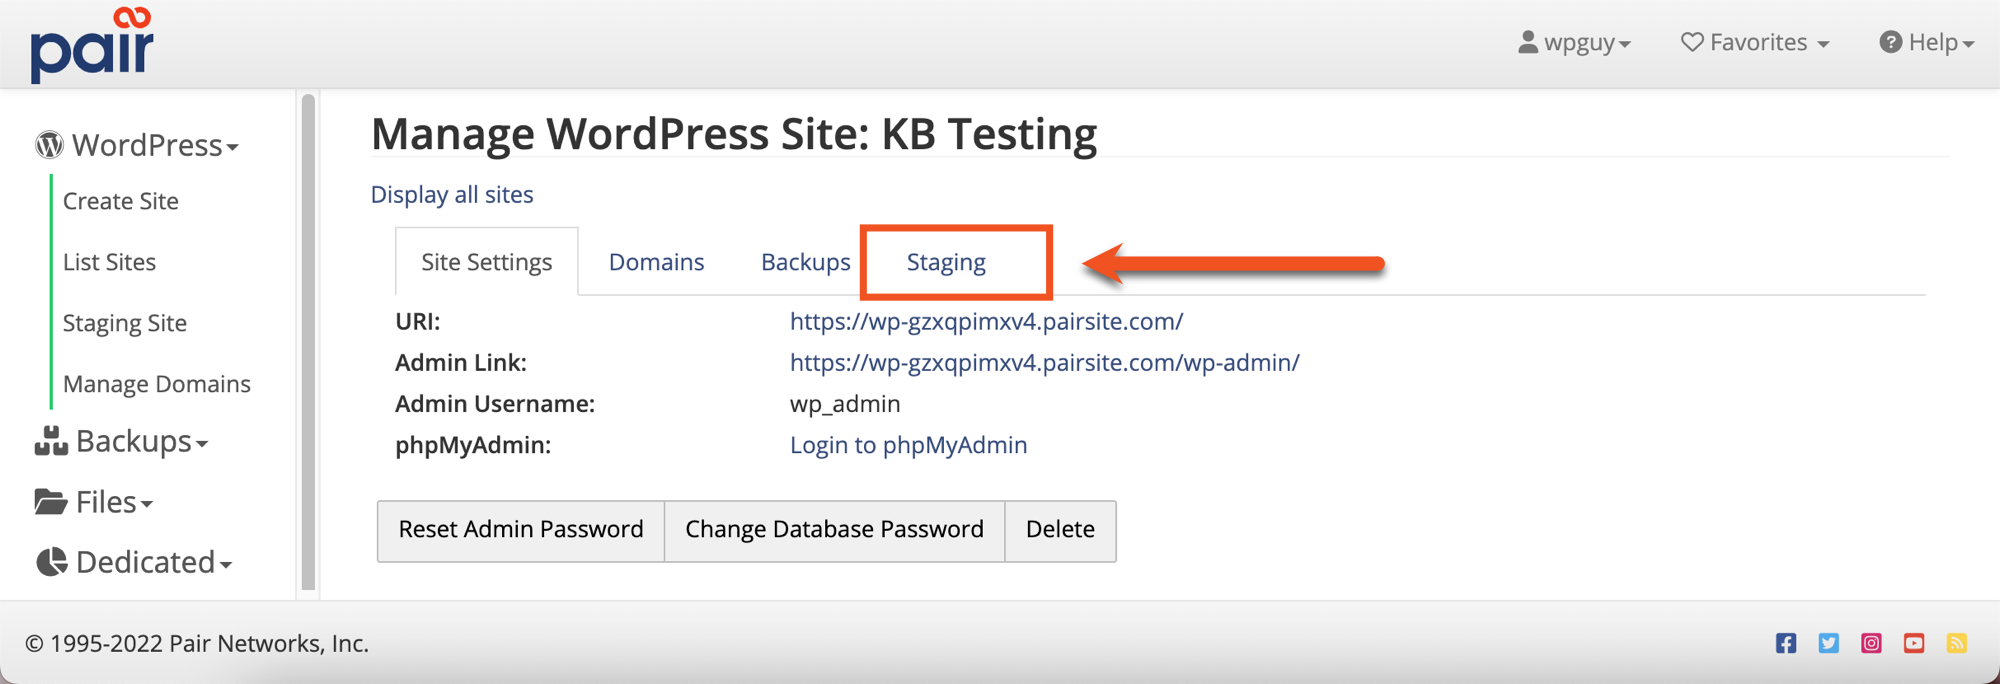
- Click the Staging tab
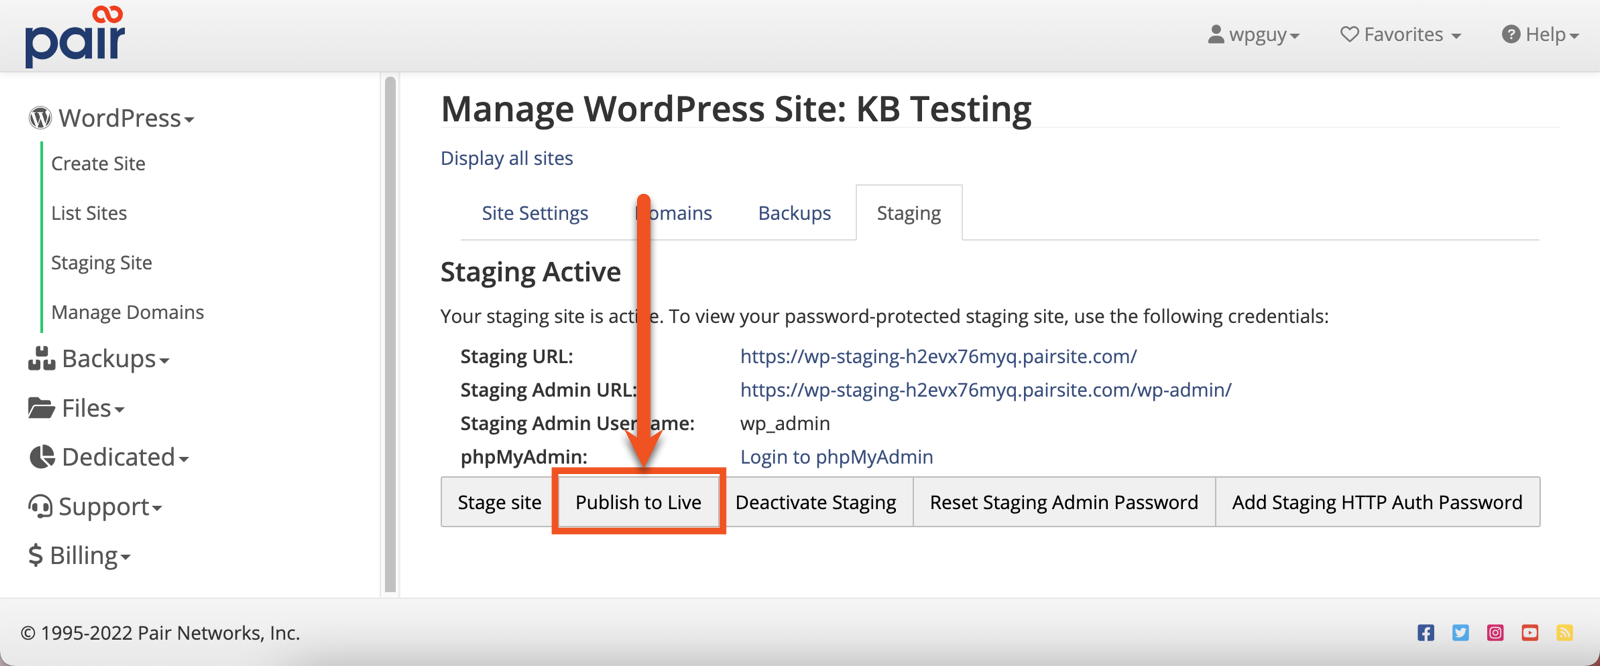
- In the bottom navbar, click the Publish to Site button
- On the next page, click the Copy Staging to Live
- Wait while the site is copied over

Once the process finished, you will see a green banner indicating that your site has been successfully copied over.
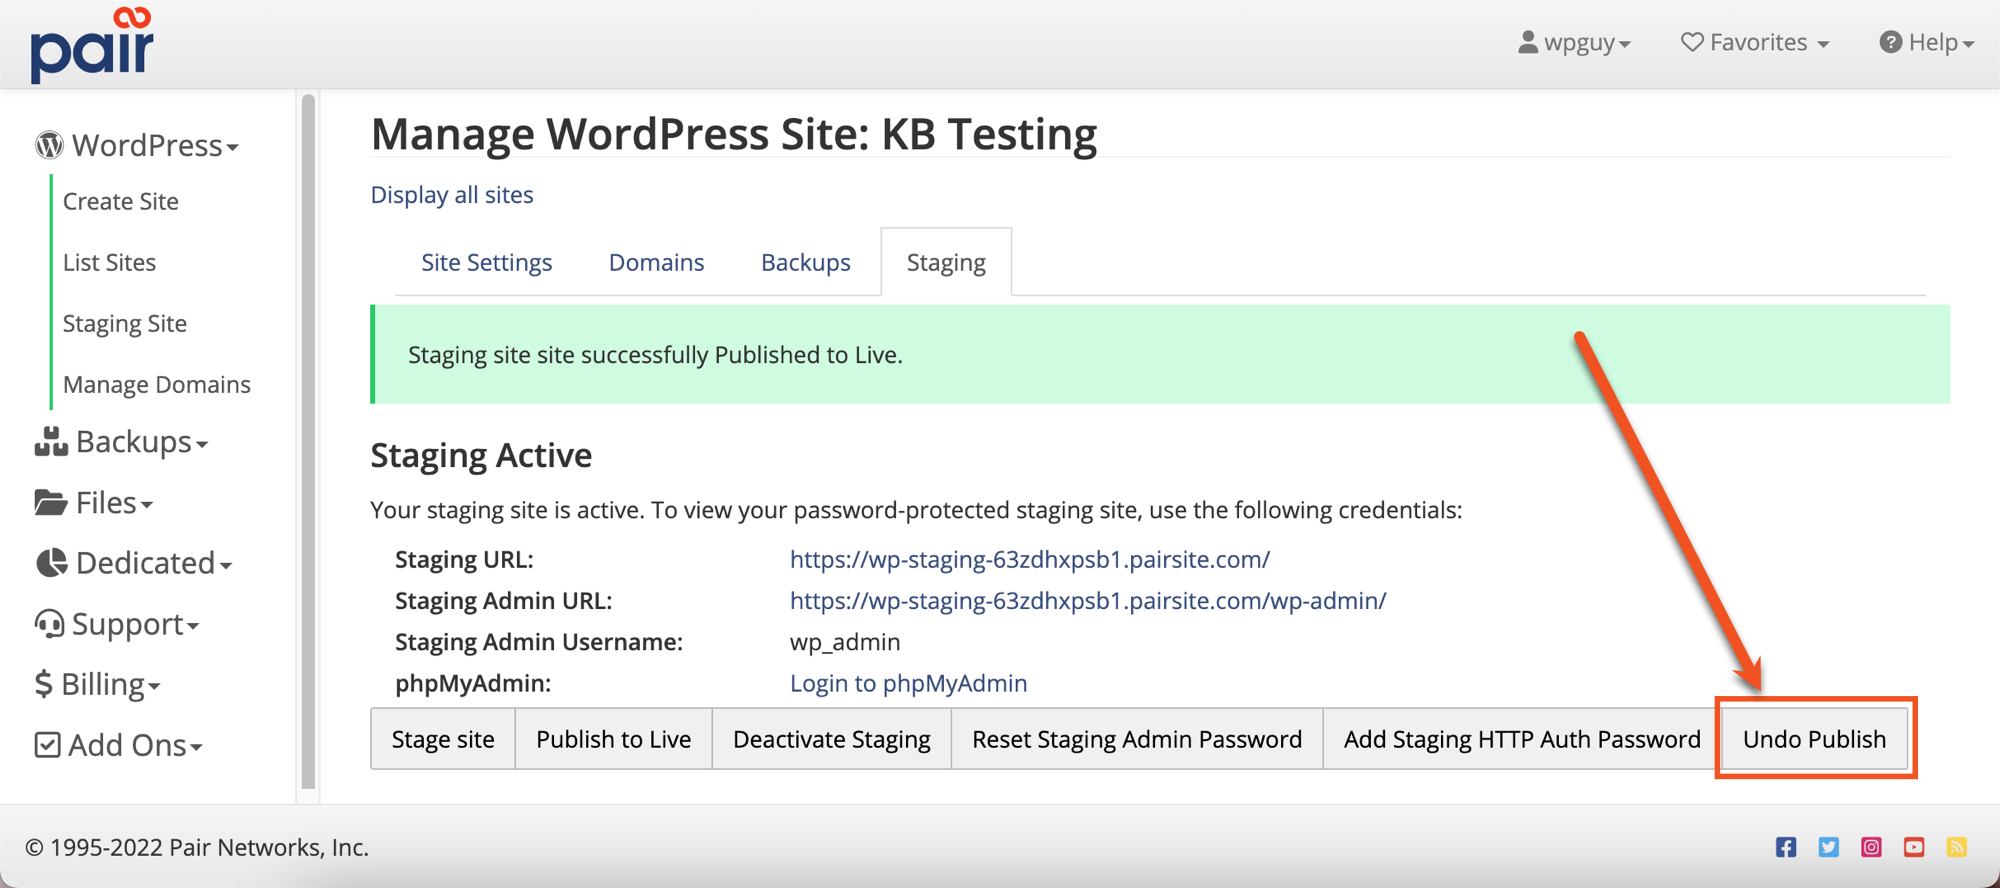
If you want to revert to the previous live site, an Undo Publish button is available for a limited amount of time after the launch. Clicking this button will take the backup of your previous live site and restore it. Find the button on the far right side of the navigation bar in the Staging interface.