Adding a column to a table is a necessary step in creating a functioning database in phpMyAdmin. If you need to set up a database, see our article, Create a Database. To see how to add columns to a database, follow the instructions below:
Adding a Column to an Already Existing Database Table in phpMyAdmin
- Log in to phpMyAdmin. For help doing this, see our article, Accessing phpMyAdmin in the ACC
- Once logged in, go to the left sidebar and click the name of the database table you want to add a column to
- Click Structure in the top navbar

- Underneath your existing columns, there is a line: Add # Columns
- Enter the number of columns you want to add in the number field in this line

- Select the location of the new column

- Click Go
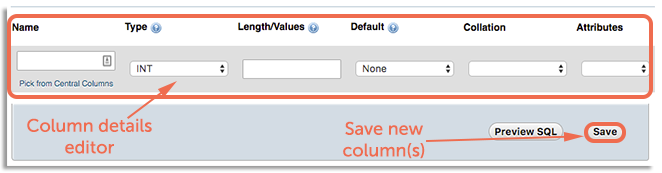
This will take you to a new page where you can enter the details of the new column. When you have finished editing your column, click Save.
This will add your column to your table.