Shared VPS Dedicated WP Professional WP Professional Plus
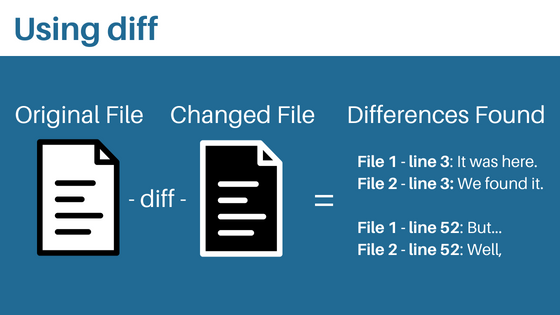
The "diff" tool calculates the differences between two text files. That difference is called a patch. You can apply a patch to another file using the "patch" tool.
Why use diff and patch?
Reason 1: diff can be useful by itself to see what has changed between files, even if you never use patch.
Reason 2: Sometimes you can get patches from third parties and apply them to your files. This can be beneficial in cases when the files being patched are large, but the number of changes is relatively small: transferring a patch file is more efficient than transferring the entire file.
Reason 3: You can apply patches to files that don't perfectly match the original file used in diff.
For example, if you use a CMS with a configuration file, and make local modifications to that configuration file, you want to preserve those local changes when you upgrade your CMS. Copying the vendor's new configuration over your version will lose your changes. However, in many cases, you can still safely use patch to apply the vendor's changes from the most recent version without losing your own changes.
What is diff?
diff is a way to compare files for differences (hence the name "diff") from the command line. For example, if you have an original file, then make some changes and save it under another name, you could compare the two using diff.
diff Syntax
diff is used in the command line. The basic diff syntax looks like this:
diff [options] [original filename] [changed filename]
This command sets up the basic structure for comparing one file to another. There are also options to add more functionality to a command.
Basic Syntax (without Options)
Replace [original filename] and [changed filename] with the actual names of the files. Be sure to include the file extensions with the file names. A basic diff command without options may look something like this:
diff file1.html file2.html
In this example, the command would compare file1.html and file2.html and output the differences into the command line.
diff Syntax (with Options)
diff options add more functionality to commands. However, options will change the command syntax a little.
diff options go between diff and the first filename:
diff -y file1.html file2.html
You can also combine multiple options in one command. Do this by adding all the pertinent options’ letters after the dash (-). It will end up looking something like this:
diff -uy file1.html file2.html
You may also see a variation that gives each option its own dash (-). Both methods of adding multiple options are valid
diff -u -y file1.html file2.html
See below for a list of commonly used options:
| Option | Description |
| -N | Ignores absent files |
| -r | Recursively executes diff through a directory. Used to compare multiple files at once. Note: this is not the same as -R, which is a patch option |
| -u | Displays output in an easier to read format. This may remove some information, such as context lines. |
| -y | Forces output to display differences side by side. |
For more options, see this list of diff options by GNU.
diff Output
When a diff command is run, the basic output will look similar to this:
11c11
< this is text from the original file
---
> this is the same line from the second, changed file
Only changes will be displayed in the output, so you don’t have to weed through the two files. Instead, diff compares and pulls the changes out for you to view.

How to Read diff Output
Here’s a brief guide about reading diff’s output.
The First Line of Output
The first line in the output indicates the line numbers that contain differences and the type of changes that have been made.
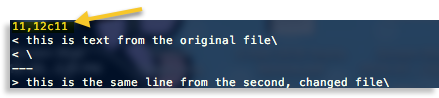
If two numbers are separated by a comma, this means that there are changes from the first line number through to the second. In the example image above, 11,12 would indicate that there are changes on lines 11 - 12.
The “c” that separates the line numbers in the example above indicates the type of change that occurred. There are different letters that indicate different types of changes:
| Letter | Meaning |
| c | Content was replaced |
| a | Content was added or appended |
| d | Content was deleted |
When using patch, which will be explained in the What is patch? section, these letters will be important.
The Rest of Output
The rest of the output concerns the actual differences between files.
The changed lines will be listed next to < or > angle brackets. Three dashes (---) indicate that the end of the first file’s line changes and the beginning of the next file’s. It will look like this:
< text from file one
---
> text from file two
Now that you have a basic understanding of diff, it’s time to move on to patch.
What is patch?
patch is a command that takes the output from the diff and puts it into a file. Then, it can take the filed output and overwrite another file with with the changes. For example, a common use is to use the patch to transfer changes from the changed file to the original file, thus making them identical. While this can also be accomplished by copy/pasting the updated file into the original file, patch is much faster and efficient.
How to use diff and patch Together
diff works by cataloging the changes between the two files or folders. Patch can take those changes, put them in a file, and update older versions with it.
patch Options
The patch command also has its own set of options to add functionality. Find a list of commonly used options below:
For more options, see this list of patch options by GNU.
Creating a patch
Creating a patch file is the first step for using patch and diff together. The patch file can be used to add changes to other files, and so it is necessary for commands like Overwrite the original file with changes.
To create a patch file, enter the command below into the command line:
diff -u file1.html file2.html > patchfile.patch
In the example above, the diff output will be saved into a file named patchfile.patch. When executing the command, be sure to change file1.html and file2.html to actual file names.
Overwrite files with changes
Once the patch file is created, you can use it to copy the changes to another file. For example, you may want to overwrite file1 with the changes from the updated file2. To do this, you could use syntax like this:
patch file1.html patchfile.patch
Replace file1.html with your original file. This would overwrite the old contents of file1.html with the changed contents of file2.html.
How to Reverse a patch
If you want to revert the file to its previous version before patching, you can do so by running this command:
patch -p0 -R -i patchfile.patch
The command line will then prompt you to input the name of the file you want to revert. Once the filename has been entered, the reversing process will begin. If successful, the file will be reverted to its previous state.
patch Directories
Using diff and patch on whole directories is a similar process to using it on single files.
The first step is to create a patch file by using the command:
diff -ruN folder1/ folder2/ > patchfile.patch
Then, you would issue the command to patch the original folder, which in this case is folder1:
patch -s -p0 < patchfile.patch
If successful, your original directory should now be updated to match the second, updated folder.