To give an email address permission to post to the mailing list, you need to make them an authorized sender. Authorized senders are email addresses that are automatically approved to post to the mailing list. If you try to post to a list without first being a member or an authorized sender, your post will automatically be rejected.
PairList does not have any default authorized senders, so it is important to configure at least one - especially if you have an announcement-only mailing list.
Adding an Authorized Sender
The first step to setting up an authorized sender depends on whether the email address you wish to add is subscribed to the mailing list or not. If the email address is already subscribed, go to the Adding a Subscribed Authorized Sender instructions. If the email address is not subscribed, go to the Adding a Non-Member Authorized Sender instructions.
Adding a Subscribed Authorized Sender
If you are already subscribed to your PairList mailing list with your preferred email, then you will need to turn off moderation in your mailing list for that email address. See the following instructions to see how this is done:
- Log in to the mailing list’s admin interface. For instructions on how to do this, see our How do I get to the PairList Admin Interface? article.
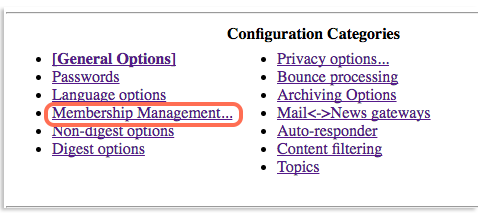
- In the top lists, click Membership Management
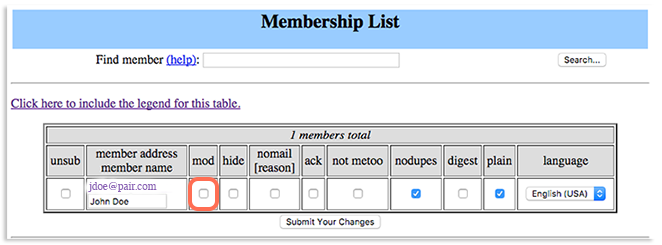
- A list of your subscribers will appear. Find your preferred authorized sender address
- Once you have found it, go to the corresponding checkbox in the mod column and make sure it is not checked
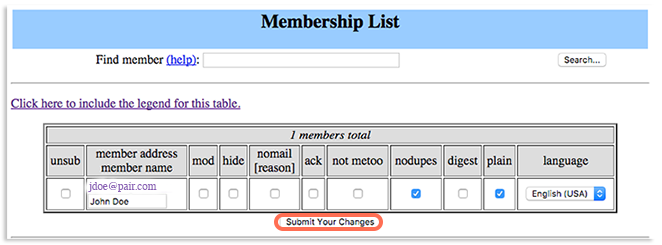
- If you unchecked the box, be sure to click Submit Your Changes underneath the membership list
Now your email address is authorized to post to the mailing list.
Adding a Non-Member Authorized Sender
If you are not subscribed to your PairList mailing list with your preferred email, then you need to add the email address to the Accepted Non-Member list. To do this, follow the instructions below:
- Log in to the mailing list’s admin interface. For instructions on how to do this, see our How do I get to the PairList Admin Interface? article.
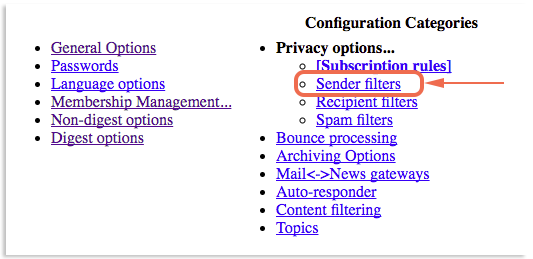
- In the top lists, click Privacy Options

- New options will appear under Privacy Options. Click Sender Filters
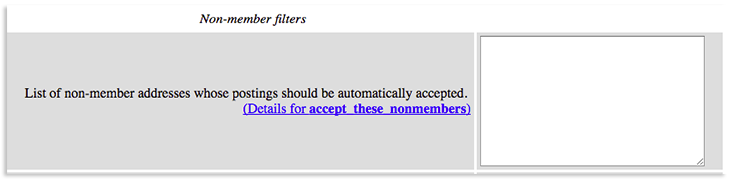
- Scroll down to the Non-Member filters section
- Add the desired email address in the textbox next to List of non-member addresses whose postings should be automatically accepted
- At the bottom of the page, click Submit Your Changes
You can now send messages from your authorized sender address(es) to your mailing list. If, at any point, you want an email address to cease being an authorized sender, simply remove the address from the List of non-member addresses whose posting should be automatically accepted or check their name in the mod column.